
I am a hot drink lover. Whether it's hot chocolate, coffee, or tea, I love it all! So naturally I have a bit of a tea collection in my pantry. That's all well and good when it's just me, but when I have guests over it can be pretty cumbersome (and overwhelming) to pull out 10 different boxes just to offer them a drink! This tea box solves that problem.
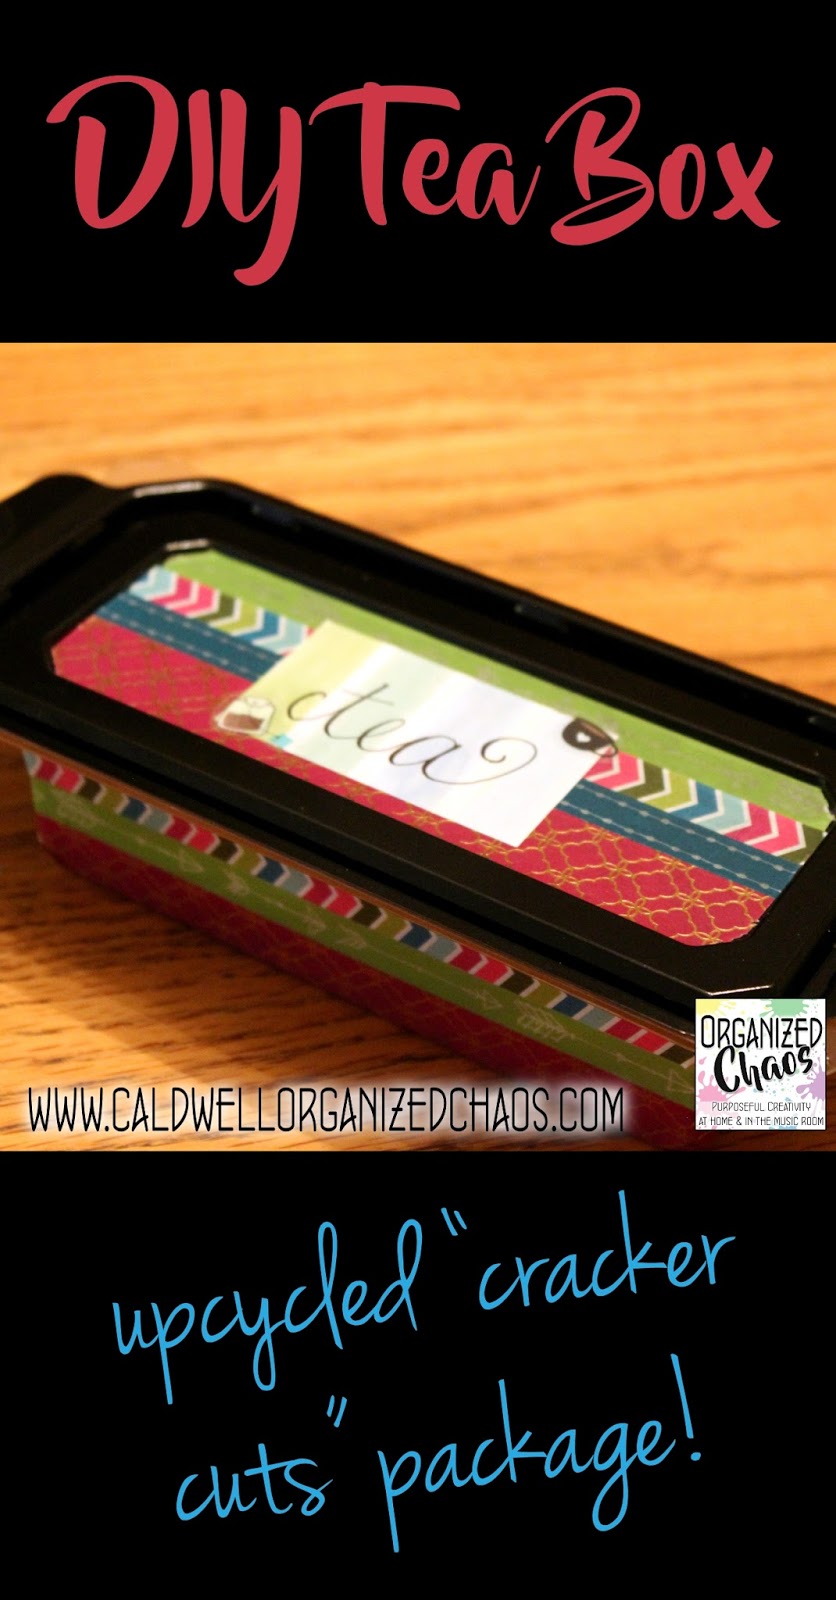
Another thing I love are those "cracker cuts"- cheese that is pre-cut into squares. They are so easy to pack in lunches and they're great to put out as a no-fuss appetizer or a quick snack after school. So I started accumulating these nifty long, rectangular plastic boxes that the cheese came in- I knew there had to be a way to reuse them!
Turns out, they are a great size for tea bags:

Besides the nice shape, these boxes also have a pretty good seal on the lid, so I can keep some of those tea bags that aren't individually packaged in there too- I just cut out a piece of the box so I know what type of tea it is, and stuck a few of each tea behind the cutout.
Honestly if you don't care about aesthetics, you could just rinse out the box, flip it over, and throw some tea bags in there. But of course I wanted mine to look a little more fun, so I cleaned off the original label and stuck some washi tape around the outside and on the lid. I put a few stickers on the top to write the word "tea" on the lid, and that's it!
I'm happy to have this little box on hand for the next time I have people over! Now to find some people to invite...... ;)
Join the Organized Chaos family- sign up for the newsletter right here!
No comments :
Post a Comment