Image Map

Tuesday, June 27, 2023

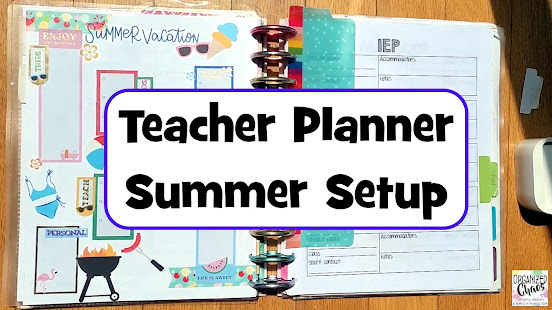
Setting Up My Planner for Summer Break

It's summer break and that means no lesson planning for a few months, and a much more relaxed schedule in general! But I've learned I still function best using my planner, even when I have far less to write down- I end up more stressed when I try to put my planner away! Here's how I switch up my teacher planner in the summer months.

1. Remove old monthly and weekly pages

It is an awesome feeling, and a great way to help me process the school year that has just ended and emotionally and mentally transition to summer break, when I take the monthly calendars and weekly lesson planning pages out of my planner. It makes my planner a whole lot slimmer and lighter too! I take the time to flip through the pages and remember everything that happened before I take them out- it's like looking through a scrapbook or photo album- which helps a lot with my transition from the hectic school year into summer. The abrupt switch from the hectic school year to summer break can be tough, actually, but taking the time to remember and reflect, and then physically remove those pages from my planner, really helps.

2. Set up a summer at a glance calendar and summer bucket list


Actually I set up my "summer at a glance" calendar (which is just the 3 summer month calendars all on one page) before the end of the school year so I could start planning all of the vacations etc and keep track of dates, but I do highly recommend it. Even though I do add in the monthly calendars for summer months just like the rest of the school year, having the major travel/ camp dates for the whole summer on one page is really helpful. 

The summer bucket list is something I've been doing for years and it really helps me stay focused on my goals for summer vacation- no, not just work things, but mostly family things, home things, and self care things that I tell myself all year, "I'll have time for that during summer break". You can read more about the different ways I've set them up over the years, and how I think about categories of items to keep on my list, in this post.

3. Add in summer monthly and weekly pages

I used to go straight to adding in next school year's pages as soon as school got out but I don't do that anymore- not only have I learned from the pandemic that you can never take schedules or calendars for granted that far in advance, but I like having the concrete reminder of the switch from school year to summer break to keep my brain from jumping straight into planning and preparing for next year. The beauty of the #PlanMyWholeLife planners is there are lots of weekly planning pages in the "business" section of the printables that have just enough space to note basic things like play dates and meal plans but take away the extra unnecessary lesson planning space. 

If you want to see all of this in action here's a quick video of my process to help you visualize how I use my planner all through the summer! 


Do you use your planner over summer break? I know some people throw all calendars out the window entirely, and some continue using the same planning pages they do during the school year- I've found this happy medium works best for me, but I'd love to hear what other teachers do in the comments.

Monday, June 26, 2023

3 Kitchen Organization Tools and Tips

After moving into my new house recently I've been working in getting everything organized, and the kitchen was definitely a top priority! Today I'm sharing 3 of my favorite organization tools that have made a huge difference in my kitchen organization without breaking the bank (don't miss the last one, it's definitely my current favorite!).

This post contains affiliate links which help support this page


TIP: group like items together

I never had wide drawers in a kitchen like I do in my new one, so this was a new problem for me that required new solutions! To take full advantage of the drawer space I quickly realized I needed a way to divide up the space to keep items from sliding around into one big jumbled mess. Yes, smaller bins can serve a similar function but I like these better for bigger drawers that need bigger sections- these ones I found are adjustable and they were super easy to install (plus they fit my tight teacher budget).


TIP: similar sized containers maximize storage space

I know. I never thought I would be one of "those people" taking spices, or anything else for that matter, out of its original container just to put them in another container... but when my pantry space was at a premium and I was trying to find a way to fit everything in, I realized what a space saver this was. I wish I had the foresight to take a "before" picture but just imagine a typical collection of spice bottles of all different shapes and sizes- I was only able to fit about 2/3 of these into the drawer before I got these, just because they don't fit neatly next to each other when they're all different sizes and shapes. AND having them in a drawer like this has made it so much easier for me (and for my daughters) to find what we're looking for. Before I had some on a pantry shelf and some on a rotating spice rack I bought as a set, and the labels were all different so it took time to read and find what I wanted, especially if it wasn't something I used regularly. So much easier now, and it's a lot easier to see how much I have left of each one when they're all laid flat. For my most-used spices that I buy in bulk sizes, I filled up these smaller bottles to keep within reach and stored the extras on a top shelf so I can refill when needed.


TIP: avoid overcrowding a container to make things more accessible

These are by far the best thing in my kitchen and also the cheapest and easiest to install! I can't recommend them enough. They stick to the bottom of the upper cabinets and spin around so you can see and access any of the 6 hooks. I'm sure I'm not the only one who has always had a vase sitting on the counter holding all of these spoons, spatulas, and whisks- these are always the things I reach for the most when I'm cooking and often am trying to grab quickly after realizing the food was going to burn if I didn't get it out fast! The vase made it hard to find things, especially the ones with shorter handles, and it was completely overcrowded. I had to strategically wedge things in to get them all to fit! Now I can see everything and grab exactly what I need without rearranging the entire container to get to it.

I have more tools and tips to share from my kitchen but this post will get too long if I keep going! Let me know if you're interested in a "part 2" with more favorites, and let me know what other spaces in the house you'd like to see next, in the comments below.

Tuesday, June 20, 2023

Making a Summer Bucket List

How many times have you walked into school on the first teach work day of the new school year saying, "I meant to do ___, where did the summer go?" Having a place to write down goals for things I want to happen over summer break helps me get so much more out of my time off and I feel so much more satisfied, refreshed, and ready for a new year when the new school year rolls around. Plus it's fun! Here's how to set up a bucket list for summer so you can really make your break everything you want it to be.


Pick a Spot

I've done my lists like this different ways over the years- sometimes I use a blank page in my planner, like I did this year, sometimes I've done sticky notes that I keep in my planner or somewhere in my room, and some years I've had a page on my fridge or in my kitchen where I can see it and add to it any time. They're all great options, the important thing is to pick one place to be your "brain dump" spot for all those "I really want to ____ this summer" thoughts.

Create Categories


The biggest key to making a good summer bucket list is to create categories under which you can list ideas. Think about the types of things you want to do this summer- you might have categories like:
  • travel
  • family activities
  • home projects
  • school projects
  • doctor appointments/ self care
  • books to read/ movies to watch
  • people to see
Obviously I used planner stickers to create categories on my page in a fun and visual way, but it doesn't have to be fancy- many years I have just used one sticky note for each category and stuck them all on one piece of paper. The important thing is that the categories help with maintaining balance in how I spend my time over break by reminding myself of things I want to do in all aspects of life, not just work-related projects, and it helps me organize all the thoughts swirling in my head when I break things up into categories.

Keep it Accessible

Once you've dumped all your initial ideas into your list, keep it somewhere you'll see it often. Then when inspiration hits, or boredom strikes, you can remind yourself of the things you hoped to do, and you can add to your lists as you think of other things too.

Teachers, have you ever made a bucket list for yourself like this? Let me know in the comments!

Monday, June 19, 2023

Bedroom Storage & Seating Upgrade: Yaheetech Storage Ottoman Bench

So I recently moved into a new house and that means a fresh opportunity to organize and design every part of my house- I cannot wait to bring you along as I look for ways to set up our home in ways that are functional and aesthetically pleasing on a teacher budget and a busy mom schedule. I had to start off with my favorite addition to my bedroom that I am completely obsessed with, that serves as both a comfortable and stylish seating option and hidden storage: the Yaheetech storage ottoman bench!

I was sent this item for review. All opinions are completely my own. Affiliate links do not affect price or purchase experience.

Because I am a single parent of 2 children, I have never actually been the one to use the master bedroom, and this time is no different. The size of my room is about the same as my previous house, but unfortunately I lost a LOT of closet space- in fact my new closet is half the size of my old one. That meant I had enough room for my hanging clothes and drawers, but no way to keep the shelving unit I had in my old closet behind closed closet doors. You can see how I had my old closet set up in the picture below (and click on it to read the full post of what I used and how I set it up- it worked really well for me!).


Initially I assumed I would just keep the shelving unit in the room, just not in the closet. But I quickly realized that meant having bins labeled as "underwear" and "socks" out where everyone who walks in the room can see it... I didn't think I would care, but I did. It just felt weird. Plus it was just not the calming aesthetic I wanted for my bedroom... See what I mean?


Enter the storage bench. Not only did it give me a place to store the clothes I had in the shelving unit in a way that was hidden from plain sight, but I didn't need labels because when I open the bench I can see the contents. Using some smaller bins I had on hand from when my daughters were toddlers, I was able to divide up the storage space inside and fit the contents of what ended up being not just the 3 bins in the picture but 5 of those bins- I added the PJ tops and bottoms in as well.


Now it's easier to get everything in one place instead of pulling out all different bins, it's more compact, and it looks nicer in the room! Not only is it functionally a better storage option, but it adds a beautiful window seat with a small footprint that doesn't take up too much valuable space in the room:


My room looks so much more sophisticated and comfortable just by adding this one piece. And now that I freed up that space on the shelving unit, I can style the shelf to also look more sophisticated and use it to store other items like my craft supplies as well as add some decorative pieces- I have lots of ideas I'm working on but I used what I had on hand to try out what it could look like:


So much better already! I can't wait to play around with the shelving unit now- I will be sharing what I end up doing with that soon. But the best part about the bench, in my opinion, is that it is super inexpensive without compromising on quality. Most storage benches are super expensive- most of the ones of this quality are hundreds of dollars, so I never thought I would be able to afford a new one on a teacher budget- but this one is well under a hundred. And judging by the price you would think this would be cheaply made, but this truly is not. I used to have a storage bench I got off of craigslist in my old entryway that I thought was amazing, but it was super dangerous for little fingers because the lid didn't stay open. This one has solid hinges that stay open at any height- no more gingerly holding the lid open with one hand while trying to grab what I need with the other!


Oh, and one more thing I love: assembly is so easy and quick. I normally hate buying furniture new because it means I have to put it together. If you've ever bought something new from a certain Swedish furniture company you know what I mean... *cough* so I was a little worried when I opened the box. But all I had to do was screw in the legs- it seriously took me 5 minutes and no tools at all! Score!

Thank you to Yaheetech for sending me this bench- I love it and I HIGHLY recommend it for anyone looking to add style and organization to any room of your house on a teacher budget. And they have tons of other beautiful, practical, and budget friendly items I have my eye on as I continue to set up my home- you can check out their website here to see everything they have to offer. If you have never heard of their company before here's a little about them:

Yaheetech is a cross-border e-commerce company established in 2003 with more than 500 employees worldwide. With our own 39 warehouses around the world, we provide a wide range of products with fast delivery to millions of customers in more than 10 countries, available on Amazon, Walmart, eBay, Wayfair, Wish, Cdiscount,  ManoMano, OTTO, Rakuten, Real and more. We devote to make your life comfortable.

I can't wait to show you the other home organization projects I've been working on! Which space do you want to see next? I will be sharing more home organization posts this summer, along with my teacher content, as I find creative ways to organize everything in ways that work for our busy family without breaking the bank. Stay tuned!