Image Map

Monday, December 29, 2014

Mommy Monday: 5 Tips for Setting Meaningful Goals

Well, Christmas is officially past and New Year's is almost here. Did that go by extra-fast for anyone else?!? Goodness gracious.

This week is winter break for me so I am trying to get my life in order (emphasis on TRYING) before school starts again. One of the first things I did was sit down and think about how I have been using my time this past year, and how I want to improve so that I can focus on the things that matter most to me.


I made these goal-setting worksheets this past summer when I was starting my blog and TpT store, because I wanted to make sure that I wasn't losing sight of my priorities when I made those additional time commitments. Now that I've been at it for a while, I wanted to go back and re-think what I am doing and revisit my goals from the summer. With New Year's coming, I figured the timing couldn't be better anyway! After going through this a few times, here are my tips for meaningful goal-setting:

1. Write it down
I'm sure this is not the first time anyone has heard this idea, but it really does make a difference when I write things down. I used to spend time at the end of each year reflecting on the past year and making goals for the new year, and often I would even share those goals with my friends and family, but I never wrote them down- it just seemed like an unnecessary step. But when I write down ideas I am forced to be more concrete and I can keep the written copy somewhere where I will be reminded of my goals more regularly. 

2. Start with where you are right now
One of the most helpful things I realized, when I was thinking about how best to set goals, was that I needed to start by taking stock of my life as I was currently experiencing it before I could really decide on what changes I wanted to make. The first thing I do is write down every little thing that I spend time doing (on the sheet titled "my commitments"). I write down things mundane things like cooking, non-negotiable's like teaching and grading, and fun things like spending time with friends. I try to think of anything that I spend time on and write it down. I used 3 categories- home, teaching, and online- to help me think of everything. 

3. Choose your priorities
The next step is to look at that list of things I currently do and see if, first of all, anything is missing that I want to add. Then I look through everything and figure out what my top priorities are. I suppose if someone else looked at my list they would see that exercise is missing. Too bad, healthy people. It ain't happenin'. I know that for now, running around with children at work and at home is enough to keep me active, and exercise for its own sake just isn't a priority for me. But I did notice that it was missing and make a conscious choice to continue excluding it from my life :) 

I looked over everything on the first sheet and made a list of my priorities in ranking order (the sheet titled "my priorities"), then decided how much time I wanted to spend on each of those items. It was really telling, the first time I did this, to think about how much time I spend on items that aren't theoretically as much of a priority. I realized that, even though in theory spending time with friends was a higher priority than social media, I was spending more time on the latter because arranging times to be with friends was so difficult. Having moved a couple of years ago, and having twin infants to single-handedly care for, finding ways to just hang out was extremely difficult (and, to be honest, I think that was OK). Since realizing that imbalance last summer (and recognizing that my circumstances have changed enough to make it more realistic/practical), I have been able to be more intentional about making time for friends (and spending less time on social media). 

4. Only set goals that have a clear reason
I think in the past I would set goals because it just seemed like the obvious thing to do (like exercise, spend more time doing devotions etc). Now I force myself to have a clearly-articulated reason for a goal before I commit to it. One of my goals this year is to spend at least 2 hours a week spending time with friends. I want to do this to foster my emotional health, develop budding friendships with people I have met locally, maintain relationships with long-time friends who live elsewhere, and set an example for my girls of a healthy social life. It is easier for me to feel confident that my goals are worthy of my time and energy when I know I have a clear reason or purpose for working on it. If I have a difficult time coming up with a clear purpose for a goal, I set it aside. I know it won't happen if I'm not clear on why I'm doing it.

5. Make a specific action plan
Clearly articulating my reasons made it easier for me to think through the specific logistics of achieving my goal. Since I want to develop both my local and long-distance friendships, I decided to spend some time meeting up with friends locally but also make time to regularly call my long-time friends on the phone or skype. Since I want my girls to see my example of spending time with friends, I am planning to spend some of that time in play dates with friends with children. I also needed to figure out when I could realistically do it. For me that means making a short phone call to a friend or getting together for dinner with another family on week nights, and planning play dates or coffee with a friend on weekends. I also know that I need to make most of these plans in advance and write them in my planner to make them happen. 

So there you have it: my 5 tips for setting meaningful goals. Have you made any resolutions this year? What are they? You don't need anything special to reflect on your goals, but I've found these goal setting worksheets really helpful for clarifying my thinking- download the printables here if you're interested!

Tuesday, December 23, 2014

Teacher Tuesday: Movement Ideas for Winter

Last week I shared 5 tips for incorporating more movement into elementary general music lessons. Today I am sharing a few of the specific movement activities I have done this winter that have worked really well. Even if you have already finished your Nutcracker and Sleigh Ride lessons for the year, I hope these ideas will spark new ones for you as well!


This first activity is a cup routine to go with "Sleigh Ride" that I did with my kindergartners. I saw a video from another music teacher a while ago with a cup routine to the same piece for middle school age students (which I have since lost track of...) and I decided to make a VERY simple version to do with my kindergarten students, since I am seeing them a few extra times before winter break this year. The students loved it, and it was a great way to introduce the concept of form without really consciously discussing it. I introduced the lesson by teaching them the words to the A section ("just hear those sleigh bells..."), and then having them do the cup pattern for just the A section every time they heard it. We then went back and added the B and C sections and talked about the horse sounds (and what instruments they used).


The next set of movement activities go with the Sugar Plum Fairy, March, and Trepak (Russian) Dances from "The Nutcracker". I used these activities with my second graders, and it was by far their favorite unit so far! For each piece I told them to copy me while I did the movements, then we discussed what we did and figured out the form. I then had the students perform the movements by themselves so they could listen to the music and show the form with their movements. For the March and Trepak, we also transferred the rhythms of the movements to percussion instruments. For the Sugar Plum Fairy, we pretended to be painters. I heard the idea of pretending to be a painter with a different piece from another music teacher recently and when I tried it with this piece it fit perfectly!


P.S. Sorry about my appearance- we had an assembly that day...

I hope you find these ideas useful- they were a huge success in my classroom and I will definitely be using them again next year!

Monday, December 22, 2014

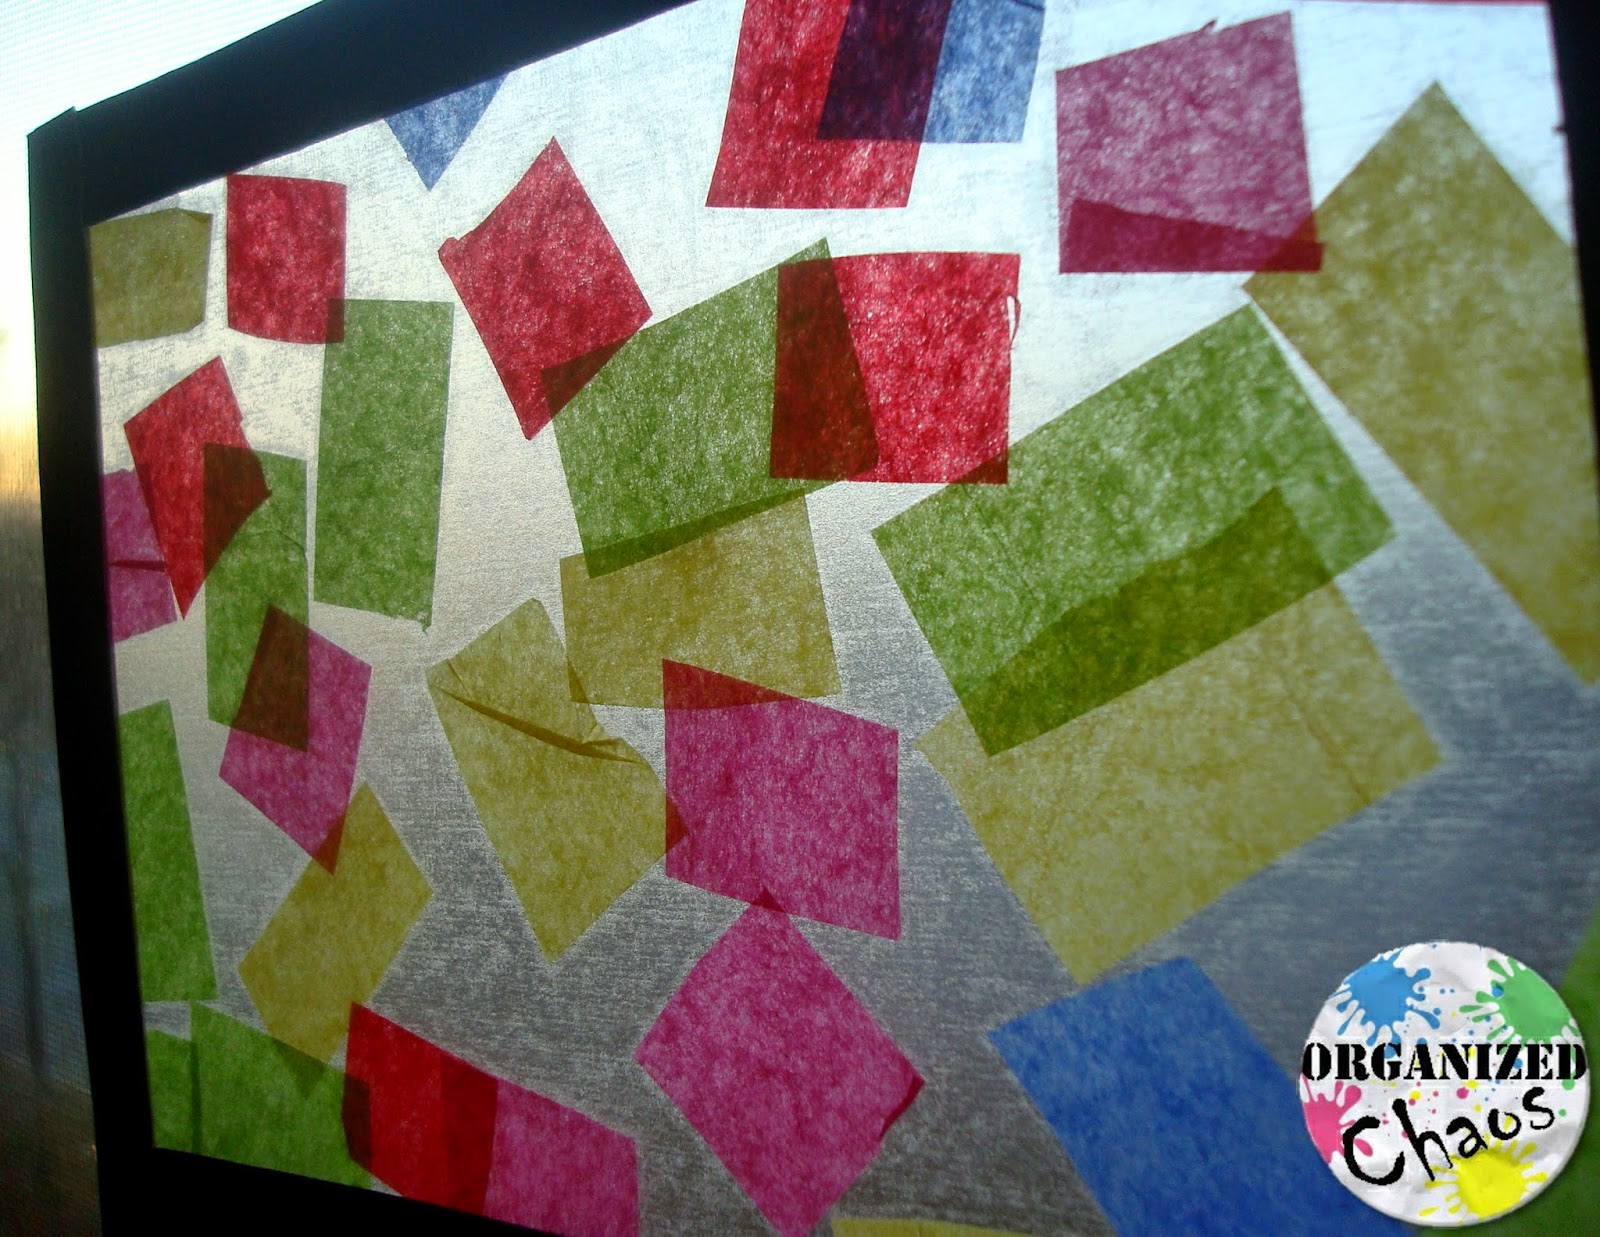
Mommy Monday: Toddler Craft- suncatcher window ornament

As I was coming up with ideas for the girls' Advent calendar activities, I tried to find some easy and fun crafts that we could do together. One of the ideas I came across that I wanted to try was a suncatcher ornament. I saw pictures of lots of different finished products made different ways but couldn't find a good explanation of how to make them, so here is how I ended up making ours. This was a fun and easy craft that was perfect as a Christmas activity, but would be great for any time of year as well.


Doesn't it look so pretty with the light shining through? Here's how we made them:

Materials: clear contact paper, black duct tape, tissue paper, scissors, tape

First I cut out 2 matching rectangles for each child from the contact paper and taped down one of them on the table, sticky side up, for each one to decorate (save the other pieces for later).


I found an assorted set of tissue paper at the dollar store, so I cut a thin strip of each color and cut it into squares or rectangles (depending on how it came out- I folded the strip and cut on the folds).


Then the girls went to town! I explained to them that we wanted the light to be able to shine through so they shouldn't roll or fold the paper. For one of my girls I had to convince her that it was OK if some of the edges overlapped each other. Other than that it was pretty easy!


Once they had used all of their tissue paper, I took the matching piece of contact paper and put it on top to seal the tissue paper inside. Then I cut each piece into smaller shapes. I was thinking of cutting a circle to make it look like a Christmas ornament but the girls both decided they wanted one big rectangle and 2 smaller ones. Then I put some black duct tape around the edges to keep it from coming apart. Since I was doing squares I just cut a piece for each parallel side and cut it in half to make two thinner pieces.


I'm not sure this step is really necessary, especially if you're not planning to keep them for very long, but I like the way it looks with the black edges. I read other posts that said they had used black construction paper for the edges but that seemed like too many extra steps for me! Plus I already had the duct tape.


From there you have two options: attach a string or hook and hang it on the Christmas tree, or tape it to the window. I decided that this year we would put them on the window and maybe next year we will put some of the small ones on the tree. I think it would look really cool in front of the Christmas lights. For now though, we're enjoying having these on our windows:


I put a small piece of double-sided tape on the back and let the girls stick them wherever they wanted. Since they are rectangles we are calling them presents instead of ornaments. It also occurred to me that we could draw Christmas-y pictures on them with a black sharpie. Maybe next year...

Tuesday, December 16, 2014

Teacher Tuesday: 5 ways to add more movement to your classroom

With testing and common core-ing, literacy and math blocks, and everything else that (although valuable) take up so much of our students' time and energy, I'm noticing a lot more pent-up energy. Kids are walking into my classroom more and more often completely exhausted and numb, or quite literally bouncing off the walls. When I walk through the halls and glance into their classrooms, I can see the problem right in front of me- those same kids are sitting at desks listening to someone. All of them. All.the.time. And when a holiday approaches? *sigh*

I've always been a big fan of incorporating movement into all learning, and especially in the elementary music classroom. Now I think it's a necessity for survival (the students' and mine)! I've compiled a list below of some of my favorite movement activities that I am using in my classes right now, and I hope all of you other teachers out there will add to the list in the comments here or on my facebook page!


#1: Dance Breaks

This one is the most simple but also can be the most fun! I keep a playlist in my iTunes that is full of upbeat music with a strong pulse. Any time I think the students need it, I announce that we are having a dance contest. This might be when the students first walk into my room, in the middle of my lesson, or even at the end when we have some extra time (or I can just tell their brains have exceeded maximum capacity). I tell them I will be awarding points for creativity and appropriateness, call a small group of students to go to the open area in my room, and start the music. After a minute or two, I call another small group, and I make sure everyone has at least two turns. With the older students, I will switch the music to a different style or genre to see who is able to change their movements to match the music. Although the #1 goal with this activity is purely to get students in a positive mindset, get the wiggles out, and give their brains a little break, it does help teach some important musical skills like developing their movement repertory, distinguishing musical genres and characteristics (as they demonstrate through the appropriateness of their movements), and keeping a steady beat.

#2: Movement with Music Listening Activities

Movement has become my go-to method for teaching musical concepts in listening activities these days. I have found that, at least for my student population, physically "doing" a concept before teaching it makes it clear and simple for almost every student- it's amazing! Here are some examples of how I reinforce various musical concepts:

Form: use a different movement (usually with the beat) for each section. This is especially helpful for music with a repeating section (such as rondo form) because the students remember repeating that motion each time.

Dynamics: crouch down on the floor when it's quiet, and stand up tall when it's loud; tip-toe when it's quiet, and stomp when it's loud; scurry like a mouse when it's quiet, and march like a lion when it's loud (and of course there are gradations of each).

Meter: emphasize the downbeat/strong beats in the time signature with a larger movement. For a fast 3/4, for example, you could take a big step on beat 1 and clap (or take tiny steps) on beats 2 and 3. A simple sway with the whole body or the arms on the downbeat is also effective.

Mood: "act out" feelings portrayed in the piece with facial expressions and body language. This is fantastic if you have a piece that switches modes, especially between major and minor.

Tempo: walk with the beat. Just to state the obvious.

Timbre: pretend to play one of the instruments you hear, or assign an animal to prominent timbres and move like them (e/g/ bird for flute, elephant for tuba).

Articulation: hop for staccato and glide for legato, or point with your fingers for staccato and sway your arms for legato.

Pitch: move low to the ground for low pitch, and stand tall with arms up for high pitch. This is especially good in a song with some big leaps. I also introduce solfege by having students move up and down with the pitches in "Do a Deer", which gets to be pretty funny by the end (do re mi fa sol la ti do, sol, do!).

#3: Use Props

A great way to bring some variety to movement activities is to use a prop with the movement. Props are also really helpful for students who are shy about moving in front of classmates- somehow holding something in their hands makes it feel safer and it gives more structure and purpose to their movements. Here are a few ideas I like to use:

Cups: Ever since the cup song we can't get enough of cup routines! Cups are a great way to show the beat (passing in a circle on the beat), form (do a different routine for each section), and meter (pass on every downbeat) with a recording. I also use them to practice new rhythms. Doing a rhythm in a cup routine can break up the mundane clapping practice! I've also had great success with older students creating their own cup routines. I usually assign a particular rhythm that has to be incorporated into their set, and they will perform them for each other.

Scarves: Nothing beats scarves for "soft and flowy" music! Scarves are a great way to get students (especially boys) to use more graceful movements if you tell them to move their scarf with the music instead of their bodies.

#4: Giant Floor Staff

I have 5 lines permanently taped on my floor, so that I can do a quick round of "letter name relay" whenever the mood strikes. I split the class up into teams, and each team lines up behind the first line of tape. I call a note letter name, and the first person from each team races to get 2 feet on the correct line or space for that letter. You should see how intense the competition gets!

#5: Expressive Conducting

I love to show this video to my students (making sure to emphasize that this is a 3-year-old!):


Then I have the students try to "expressively conduct" a different piece of music. I tell them they have to stay in one spot on the floor- that is the only direction I give. It's amazing to see what they come up with when I challenge them to do better than the toddler!

I hope you find some new ideas here to incorporate into your music classroom. Adding more movement activities can make a huge difference during pre-vacation season, testing season, or any time of year! Please do share your own ideas in the comments here or on facebook!