Image Map
Showing posts with label Home. Show all posts

Monday, August 7, 2023

Bathroom Makeover

Our downstairs powder room was super boring and inconvenient- completely covered in flat white paint, with nothing but a toilet, sink, and chipped mirror- nowhere to put anything, not even a toilet paper holder. I'm so happy with the changes we made with very little time and money- it is certainly overflowing with personality and has so much more storage now!

This post contains affiliate links

Here's a quick video tour of the space before and after (don't mind the terrible "before" video at the beginning- per usual I was a bad blogger and forgot to take before pictures or video so I had to use what I had):

The first thing, of course, was to give the walls some color. When I saw this removable peel and stick wall paper I knew this was the place to use it- it's a very bold pattern I wouldn't use on a huge wall but for this tiny bathroom it is perfect! And the colors coordinate with the wall color of the dining room/ kitchen that leads to this powder room, so it all flows together really nicely. Plus I already had a few pink bathroom items, like the little corner trashcan and toilet brush, a vase, and some artificial flowers from our the powder room in our old place that had a lot of pink in the wallpaper, so it would fit with those as well! I picked out the light blue color for the rest of the room to match the wallpaper as well, and I love how it all came together. The wallpaper was exactly as hard as I thought it would be- the first piece was a little frustrating to figure out how to put up, but once I did it once the rest was pretty easy.

Next up was getting some storage in there to make the space more usable- not having a toilet paper holder on the wall got really old really fast! I moved the small shelf in from my daughters' old bedroom and used that to hold extra toilet paper, some scented candles, cleaning supplies (in a pink bin at the bottom) and some decorative items that I already had from our old bathroom. Because the room is relatively small I knew I wanted a wall-mounted toilet paper holder that could also store some extra toiletries for guests- this one I got has been perfect and it was pretty easy to assemble and hang!

I was prepared to keep the old mirror, honestly out of laziness more than anything else, but my mom (who helped us paint the walls) talked me into getting something a little more updated, especially since it was getting corroded at the bottom. I tried to look at a couple of hardware stores to pick one up but couldn't find exactly what I needed in stock so I ended up getting this one from Amazon- it arrived in perfect condition and I definitely like the oval shape better than the old rectangular one. This room also desperately needed towel holders! This one that I got has 2 bars but is still pretty compact which is great for this small room.

The pink towels we found at IKEA- I actually took a small piece of the wallpaper to the store so I could make sure the colors matched! And we ended up finding these small artificial potted plants in a set of 3 similar to these on clearance- one of my daughters had first picked them out for her bedroom, but when I saw the price we got a few more and put some in the bathroom too! They're small but I think they make the space feel so much more fancy- my daughters said it looks like a fancy hotel bathroom now :)

The moral of the story is, if you like the idea of a bold pattern or color scheme but you're scared to do it in your house or worried that the next people won't like it... Do it. I smile every time I walk past our bathroom now, and we will definitely be enjoying it for a long time even if we eventually decide to change it for one reason or another.

Monday, July 31, 2023

3 Fridge Organization Items

We're continuing the home organization projects with the fridge today- no, there are no clear stacking bins to color coordinate your produce like all the beautiful fridges I see on social media these days, but I do have a few super practical, inexpensive items I've added to my fridge that have made it so much easier for me to keep everything accessible and easy to find in my refrigerator! 

This post contains affiliate links

1. Turntables

I saw these at IKEA and got so excited- rectangular lazy susans! Why didn't we think of this sooner?!? I've seen people use regular round lazy susans in their fridge to make it easier to reach and see things, but I never liked the way it wasted space in the corners- it's truly a round peg, square hole. But these have the same functionality of regular lazy susans with the added benefit of fitting the rectangular fridge shelves, leaving no empty corners. I know IKEA changes out their items pretty often, so if you can't find them there this one seems to be similar.

2. Hanging Drawers

Not only do these function as, essentially, an additional shelf, but because they are drawers they are perfect for the kinds of things that would normally roll around on a shelf. I usually keep a few rolls in a can on hand, and these drawers fit those perfectly. 

3. Egg Storage

OK this is probably the one thing on this list that is not entirely necessary, but I actually love it for multiple reasons:

  • I can easily grab the eggs I need without having to take out the entire carton
  • I can easily see how many eggs I have left without having to take out the entire carton to check every time I'm making my grocery list
  • It freed up shelf space

Here's a video to show you how each of them works:

They're nothing earth-shattering but they really have made my fridge so much more organized! If you want to see other organization tips and items for the rest of the kitchen, be sure to check out this post:

What do you use to organize your fridge? Let me know in the comments!

Monday, July 17, 2023

Family Craft Supply Storage

As the mother of two elementary-aged children and a crafter myself, one thing we have a lot of in my house is craft supplies! When we moved to our new house, one of my top priorities was the re-organize our craft supplies in a way that made sense for our family and how we use things, taking into account how much older (and therefore more capable and independent) my daughters are now at 11 years old. I still have more to do to get everything the way we want it, but today I'm sharing my progress so far- I'm really happy with our new setup!

This post contains affiliate links

When we first moved in I was hoping to use our hallway closet- presumably intended to be used for linens- as our centralized craft storage closet. But once I started organizing everything I quickly realized there was no way everything would fit! So I shifted strategies to sort our craft supplies into categories: items only the kids would use, items we would all use, and items only I would use. The common items I kept in the hallway closet, the kids' items I put in the girls' shared play area closet, and my remaining items I'm not quite ready to share yet (mostly my planner stickers and washi tape) in my room. 

The kids' craft storage is actually half of the master bedroom closet. Our new house doesn't have a specific "play room" like we had with our old basement, so we designated the master bedroom to be half one daughter's bedroom and half shared play space. One side of the closet is my daughter's clothes closet, and the other side is now the storage for their toys and craft supplies:


The girls have a lot fewer toys now, so a lot of the bins in the bin organizer now hold craft supplies, and some of the spots in the hanging shoe organizer have additional craft supplies as well. The majority of the supplies, though, are stored in the IKEA bins on the rails that we attached to the back wall of the closet. I cut out pieces of clear contact paper and wrote on them with permanent marker to create simple labels for the bins that we can change out whenever we need:


The hallway closet has a lot of the specific categories or projects that we use together, like sewing tools and fabric, paint and glue, tie-dye, beads and jewelry making tools, and scrapbook paper. For categories (like paint and glue) or specific projects (like tie-dye) I grouped them in clear bins with labels on the front so we can all see what's inside and find what we need. 


As a scrapbooker I have a bit of a paper problem and had an absolutely ridiculous stack of paper pads that were getting bulky and difficult to sort through in the drawer I had them in before- I knew I needed a way to store them vertically to make it easier to look through everything, and I knew I wanted to consolidate everything by color and coordinating sets to make it easier to find what I want rather than flipping through every single paper pad, especially since I had a lot of pads that I had used up a lot of the sheets. These clear paper organizers have been a game changer! For the paper pads that have specific coordinating patterns I like to use together, I took out the remaining pages and put them in a bin together where I can more quickly see the paper inside. For the rest of the paper, I took everything out of the pads and reorganized them by color. It is so much easier to find what I need now, and for the girls to use it as well (this video shows a quick tour around both closet spaces, and a closer look at the paper organizers)!


There will definitely have to be a part 2 to share more of my craft storage- I still have more to do to set up my personal craft supplies in my bedroom/ office space as well- but I'm really happy with how things are coming together so far. Our new setup makes so much more sense for our family and how we use things now! 

Do you have any craft supply organization and storage ideas you love? Which supplies do you find most difficult to organize? Leave your suggestions in the comments below!

Monday, July 10, 2023

Game Cabinet Reorganization

We're continuing our journey to set up and organize my new house and today I just had to show you how I reorganized the cabinet where we keep all of our board and card games! This may seem trivial and inconsequential but it honestly makes me giddy every time I open it- this simple reorganization has made it so much easier for us to see all the games we have without anything getting buried in a pile, and most importantly so much easier to grab the game we want without having to take out 5 other games that are stacked above or around it. So we can get to playing together faster, and never forget about all the cool games we have!

I am a huge fan of games. I grew up playing board games and card games with my family and now I love playing with my own daughters! So over the years we have accumulated a pretty good collection of them. I honestly never gave a second thought to the way we had them sorted- in a few drawers of our china cabinet, and stacked on top of each other on some shelves in the playroom. I wish I had a picture of the drawers because they were honestly terrible, because I was trying to cram in big boxes of board games with decks of cards, little games with little bits and pieces in bags- they were a mess and I honestly forgot about some of the games we had that got shoved in the backs of the drawers until we packed it up to move! Here's a picture of one of the shelves where I had some stacks of games- not the worst thing, but it meant any time I wanted the game on the bottom I had to take out the whole stack:

I'm saying all of this to try to convey just how excited I am about this seemingly small change to this:

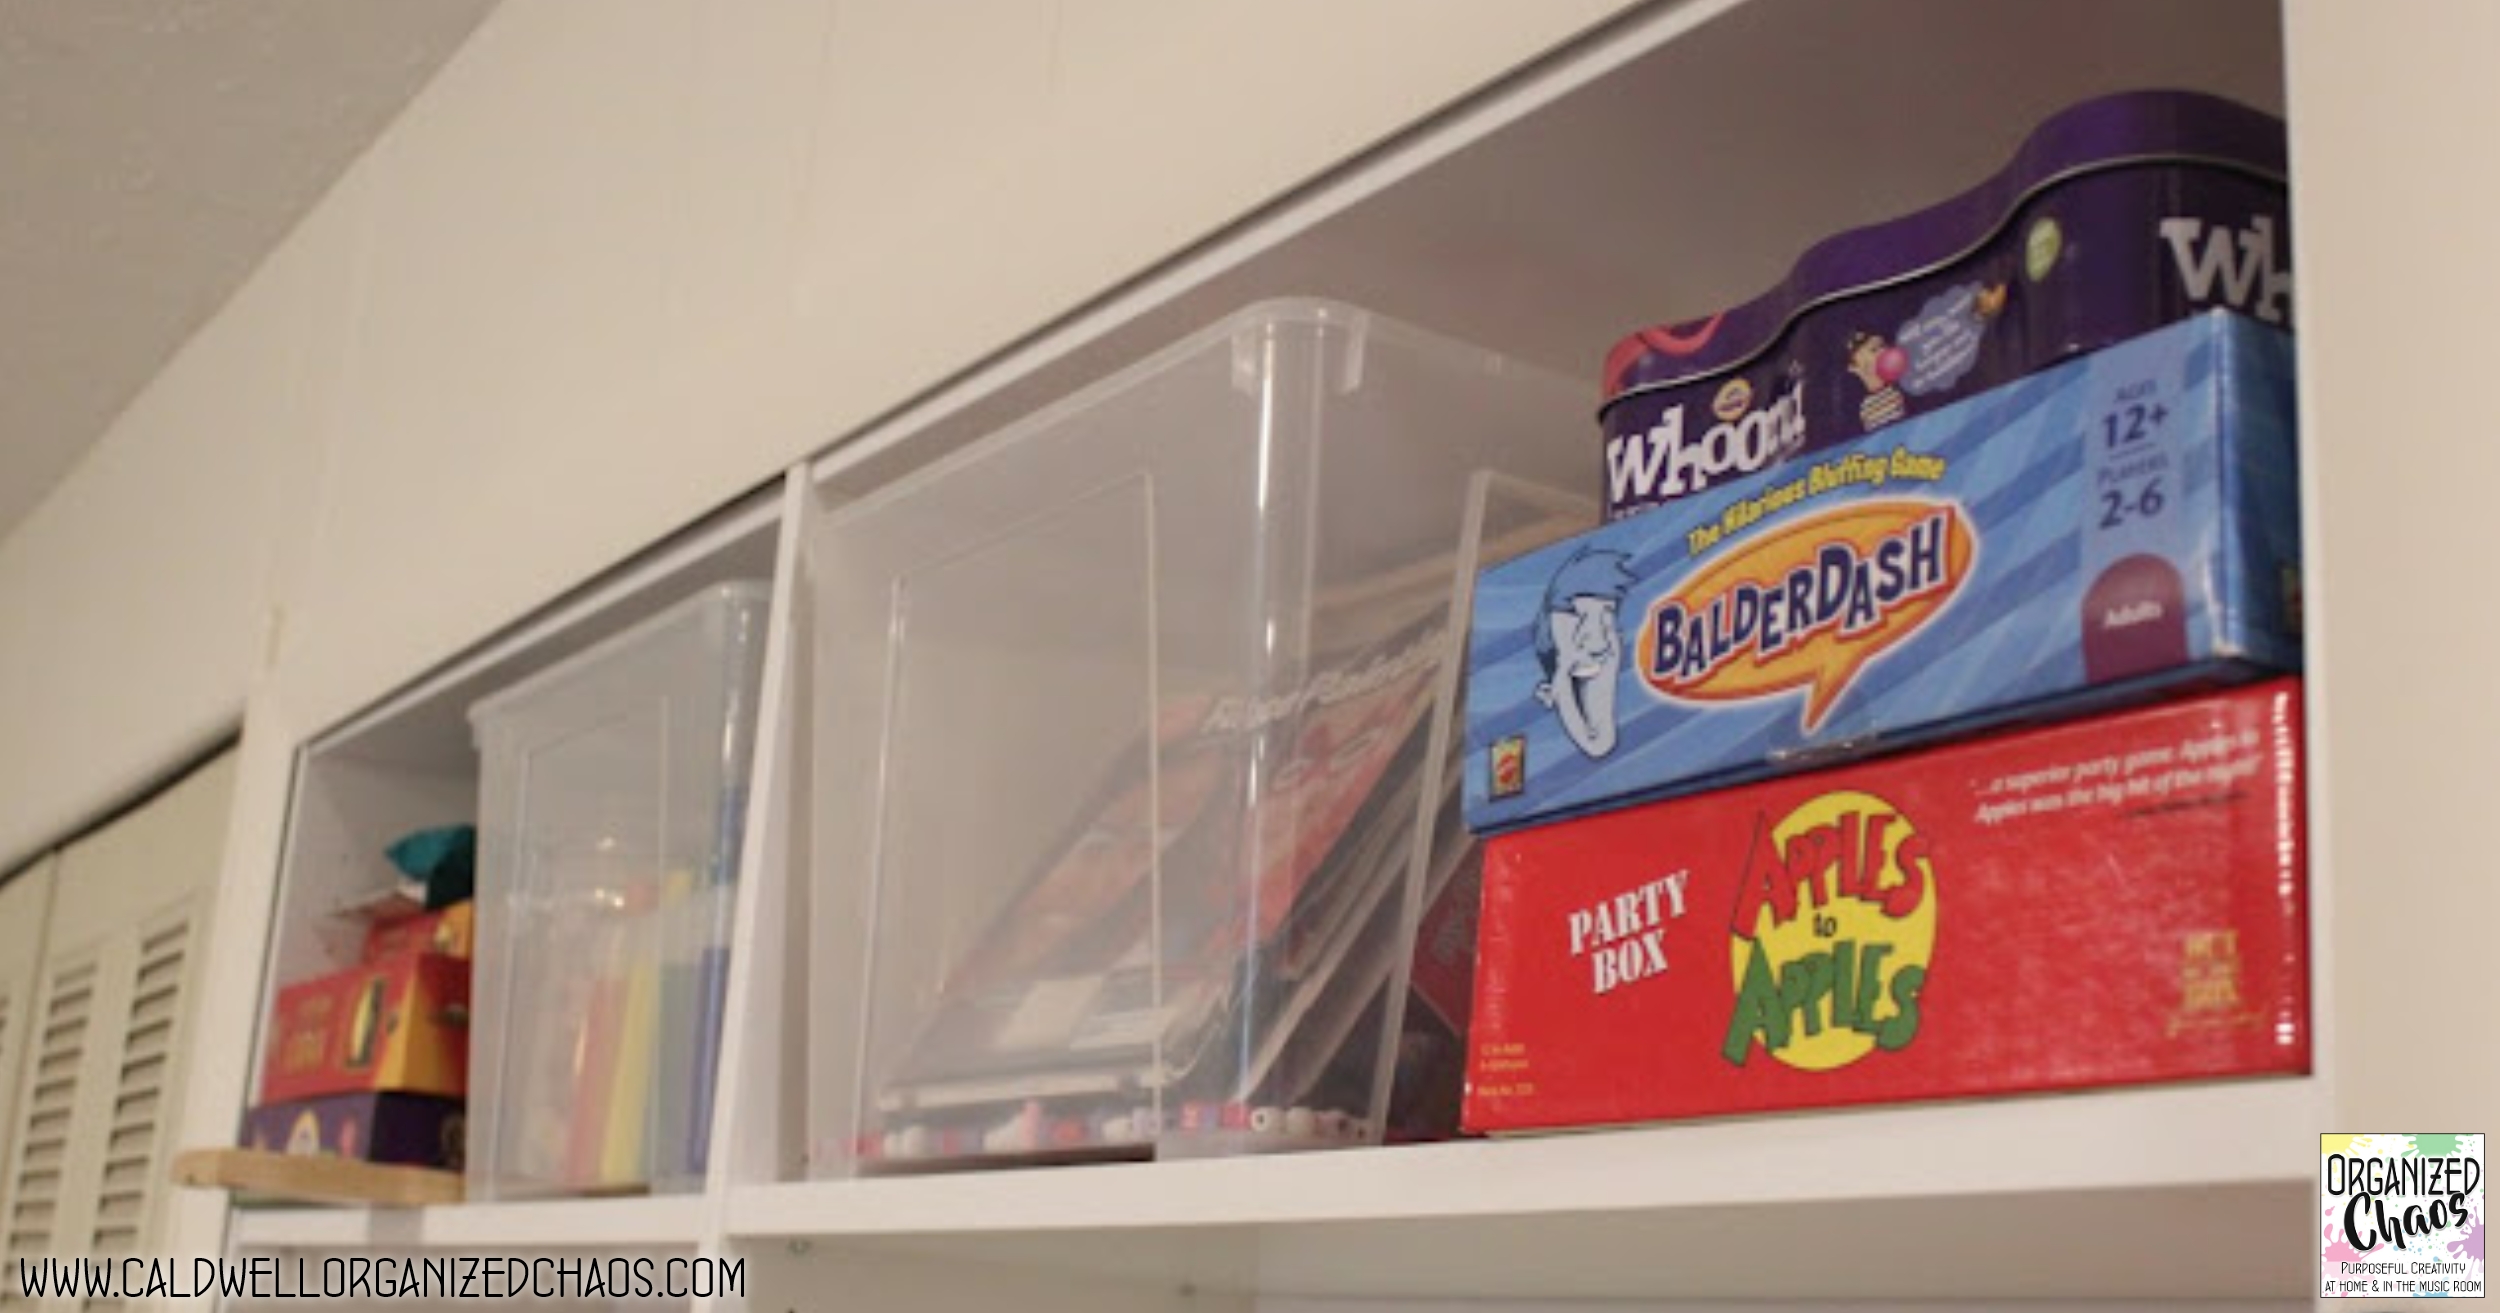
Why did it never occur to me before to put the board games on the shelves vertically?!? Now we can see them all, and grab just the one we want without moving all the others, just like books on a bookshelf. There were some games that didn't fit on the shelf vertically because of the shape of the box, so I just moved the first shelf down to the lowest spot and put the next one just above it so there's just enough room to store those bigger boxes horizontally without having to stack multiple games on top of each other- the only exceptions are the ones at the very bottom, but with only a couple of games to slide out from under another box, I'm calling that a massive win!

Storing the board games this way actually took up a lot less space too. When I first put the games in this cabinet those games took up all of that shelf space plus one of the drawers on the other side, but now that I got those out of the drawer, the smaller game pieces and decks of cards can sit in one layer in the drawer where we can see everything and grab what we want from there as well (and I even realized there were several decks of cards and smaller games that I could store vertically in the drawer as well).

All of that reorganizing not only made it easier to find and get everything, but it freed up two entire drawers where I can now keep puzzles and recipe books (this game cabinet is next to the kitchen and living room- it makes sense, trust me). Here's a quick video tour of the whole cabinet so you can see how it all came together:

So the moral of the story is if there's a storage or organization system that you're unquestioningly using that is adding some annoyance to your use of the items being stored, there's probably a way to fix it that will bring great joy to your life without buying or building anything or even requiring much time or effort. At least if a well-organized thing brings you joy like me.

I've actually written about my toy storage systems a number of times over the years (though none of them seem as revolutionary as this one to me at the moment!)- here's what I've used over the years, especially when my daughters were toddlers and preschoolers, if you're interested in seeing what else I've done (click on each photo to visit the blog posts explaining how I set them up):


How do you store your games and kids' toys? Most importantly is there anyone out there who has been holding out on me and never told me I could store my games vertically? Because I would like to have a word. 

Monday, July 3, 2023

New Entryway Tour

One of the first places I got set up in our new house is the entryway! With my teacher bags, my kids' backpacks, purses, keys, mail, and everyone's shoes there's a lot of important stuff that needed a home immediately. I'm so happy with how everything came together and it has made it so much easier to get out the door in the mornings now that our entryway is organized.

This post contains affiliate links

For me the main things I needed a place for in the entryway area were shoes and school bags. Of course I also wanted to have some extra hooks for guests to hang their coats and purses, and a place to drop mail and hang my keys. After living in the space for a few weeks I quickly realized we were actually coming in through the garage more than the front door, so I decided an organizer over the door to hang our shoes would be convenient without cluttering the actual entryway area! Here's the organizer I ended up getting- I love the size and it's very sturdy!

My favorite thing I have purchased for the house so far is this bench. I was looking for storage benches at first so we would have space to keep backpacks and school things, but one of my daughters suggested using baskets instead so that we could each easily pull out our bag without opening the whole bench, and I'm so much happier with this solution! The bench is actually intended to be a dining bench, which makes it very low profile and simple- just what I needed. I can't find the exact baskets I bought at the time on clearance from Michael's, but these are the closest ones I could find in dimensions and look. I highly recommend this idea for a small entryway!

I used to use clear plastic bins for my mail, but that definitely did not fit the rest of the wood items I had in the entryway, so I was thrilled to find this mail sorter with hooks on the side at a thrift store. There are plenty of items like this you can find online like this one, but I do like the way the hooks are on the side on mine, which made it perfect for this spot!


I added this new window film on the front door, since when I moved in there was old crusty stuff that was peeling at the edges and getting pretty yucky. I had some of this left over from a previous project, actually, and the last place I used it in my old house it held up perfectly for years so I'm confident it will last and it's so easy to put up!


The other side of the entry area has a collage picture frame, a planter (that I need to get a plant for), some extra hooks for coats and purses, a small mirror, and a small cork board where we put school fliers when there's something we need to remember. There's also a small shelf where we keep sunscreen, bug spray, lotion, and other little things like that that we tend to need coming in and out of the house. These are all pieces I've collected from yard sales over the years but I've never had them all together in the entryway like this and I'm really happy with the way it all looks:

Now that I've shown you each area, here's a quick tour around the entryway:


What things do you like to have in your entry area to make it easier to get out the door in the mornings? I'd love to hear your thoughts and ideas in the comments! I've found it makes such a big difference when we have all of our things organized in the entry area, so while this may seem like an insignificant part of the house it really makes a huge difference for me!

Monday, June 26, 2023

3 Kitchen Organization Tools and Tips

After moving into my new house recently I've been working in getting everything organized, and the kitchen was definitely a top priority! Today I'm sharing 3 of my favorite organization tools that have made a huge difference in my kitchen organization without breaking the bank (don't miss the last one, it's definitely my current favorite!).

This post contains affiliate links which help support this page


TIP: group like items together

I never had wide drawers in a kitchen like I do in my new one, so this was a new problem for me that required new solutions! To take full advantage of the drawer space I quickly realized I needed a way to divide up the space to keep items from sliding around into one big jumbled mess. Yes, smaller bins can serve a similar function but I like these better for bigger drawers that need bigger sections- these ones I found are adjustable and they were super easy to install (plus they fit my tight teacher budget).


TIP: similar sized containers maximize storage space

I know. I never thought I would be one of "those people" taking spices, or anything else for that matter, out of its original container just to put them in another container... but when my pantry space was at a premium and I was trying to find a way to fit everything in, I realized what a space saver this was. I wish I had the foresight to take a "before" picture but just imagine a typical collection of spice bottles of all different shapes and sizes- I was only able to fit about 2/3 of these into the drawer before I got these, just because they don't fit neatly next to each other when they're all different sizes and shapes. AND having them in a drawer like this has made it so much easier for me (and for my daughters) to find what we're looking for. Before I had some on a pantry shelf and some on a rotating spice rack I bought as a set, and the labels were all different so it took time to read and find what I wanted, especially if it wasn't something I used regularly. So much easier now, and it's a lot easier to see how much I have left of each one when they're all laid flat. For my most-used spices that I buy in bulk sizes, I filled up these smaller bottles to keep within reach and stored the extras on a top shelf so I can refill when needed.


TIP: avoid overcrowding a container to make things more accessible

These are by far the best thing in my kitchen and also the cheapest and easiest to install! I can't recommend them enough. They stick to the bottom of the upper cabinets and spin around so you can see and access any of the 6 hooks. I'm sure I'm not the only one who has always had a vase sitting on the counter holding all of these spoons, spatulas, and whisks- these are always the things I reach for the most when I'm cooking and often am trying to grab quickly after realizing the food was going to burn if I didn't get it out fast! The vase made it hard to find things, especially the ones with shorter handles, and it was completely overcrowded. I had to strategically wedge things in to get them all to fit! Now I can see everything and grab exactly what I need without rearranging the entire container to get to it.

I have more tools and tips to share from my kitchen but this post will get too long if I keep going! Let me know if you're interested in a "part 2" with more favorites, and let me know what other spaces in the house you'd like to see next, in the comments below.

Monday, June 19, 2023

Bedroom Storage & Seating Upgrade: Yaheetech Storage Ottoman Bench

So I recently moved into a new house and that means a fresh opportunity to organize and design every part of my house- I cannot wait to bring you along as I look for ways to set up our home in ways that are functional and aesthetically pleasing on a teacher budget and a busy mom schedule. I had to start off with my favorite addition to my bedroom that I am completely obsessed with, that serves as both a comfortable and stylish seating option and hidden storage: the Yaheetech storage ottoman bench!

I was sent this item for review. All opinions are completely my own. Affiliate links do not affect price or purchase experience.

Because I am a single parent of 2 children, I have never actually been the one to use the master bedroom, and this time is no different. The size of my room is about the same as my previous house, but unfortunately I lost a LOT of closet space- in fact my new closet is half the size of my old one. That meant I had enough room for my hanging clothes and drawers, but no way to keep the shelving unit I had in my old closet behind closed closet doors. You can see how I had my old closet set up in the picture below (and click on it to read the full post of what I used and how I set it up- it worked really well for me!).


Initially I assumed I would just keep the shelving unit in the room, just not in the closet. But I quickly realized that meant having bins labeled as "underwear" and "socks" out where everyone who walks in the room can see it... I didn't think I would care, but I did. It just felt weird. Plus it was just not the calming aesthetic I wanted for my bedroom... See what I mean?


Enter the storage bench. Not only did it give me a place to store the clothes I had in the shelving unit in a way that was hidden from plain sight, but I didn't need labels because when I open the bench I can see the contents. Using some smaller bins I had on hand from when my daughters were toddlers, I was able to divide up the storage space inside and fit the contents of what ended up being not just the 3 bins in the picture but 5 of those bins- I added the PJ tops and bottoms in as well.


Now it's easier to get everything in one place instead of pulling out all different bins, it's more compact, and it looks nicer in the room! Not only is it functionally a better storage option, but it adds a beautiful window seat with a small footprint that doesn't take up too much valuable space in the room:


My room looks so much more sophisticated and comfortable just by adding this one piece. And now that I freed up that space on the shelving unit, I can style the shelf to also look more sophisticated and use it to store other items like my craft supplies as well as add some decorative pieces- I have lots of ideas I'm working on but I used what I had on hand to try out what it could look like:


So much better already! I can't wait to play around with the shelving unit now- I will be sharing what I end up doing with that soon. But the best part about the bench, in my opinion, is that it is super inexpensive without compromising on quality. Most storage benches are super expensive- most of the ones of this quality are hundreds of dollars, so I never thought I would be able to afford a new one on a teacher budget- but this one is well under a hundred. And judging by the price you would think this would be cheaply made, but this truly is not. I used to have a storage bench I got off of craigslist in my old entryway that I thought was amazing, but it was super dangerous for little fingers because the lid didn't stay open. This one has solid hinges that stay open at any height- no more gingerly holding the lid open with one hand while trying to grab what I need with the other!


Oh, and one more thing I love: assembly is so easy and quick. I normally hate buying furniture new because it means I have to put it together. If you've ever bought something new from a certain Swedish furniture company you know what I mean... *cough* so I was a little worried when I opened the box. But all I had to do was screw in the legs- it seriously took me 5 minutes and no tools at all! Score!

Thank you to Yaheetech for sending me this bench- I love it and I HIGHLY recommend it for anyone looking to add style and organization to any room of your house on a teacher budget. And they have tons of other beautiful, practical, and budget friendly items I have my eye on as I continue to set up my home- you can check out their website here to see everything they have to offer. If you have never heard of their company before here's a little about them:

Yaheetech is a cross-border e-commerce company established in 2003 with more than 500 employees worldwide. With our own 39 warehouses around the world, we provide a wide range of products with fast delivery to millions of customers in more than 10 countries, available on Amazon, Walmart, eBay, Wayfair, Wish, Cdiscount,  ManoMano, OTTO, Rakuten, Real and more. We devote to make your life comfortable.

I can't wait to show you the other home organization projects I've been working on! Which space do you want to see next? I will be sharing more home organization posts this summer, along with my teacher content, as I find creative ways to organize everything in ways that work for our busy family without breaking the bank. Stay tuned!

Monday, July 18, 2022

Teacher Summer Renewal: home life refresh

I am at a place in my life right now where I am working towards renewal. For me renewal this summer means getting back to the things I love, the things that bring me joy that I had gotten out of the habit of doing or was forced to let go of. It means taking the fresh ideas I've learned through the pandemic and infusing them into my old best practices, both in my professional and my personal life. It means reclaiming my sense of purpose, and working towards a renewed passion and energy instead of just living in a constant state of triage. Renewal has to include my whole self and every aspect of my life, not just my role in the classroom- today I'm focusing on the ways I'm working towards renewal in my home life as a working parent.


1. Exercise

I have never had any desire to exercise for the purpose of exercise- I've always maintained that I lead an active enough lifestyle that I don't need to go out of my way and dedicate time specifically to exercise as its own activity. But I realized this spring that 1) I'm getting older, and 2) pandemic teaching and living has been far less active than my pre-pandemic teaching and living, and I've finally made the commitment to do some actual, regular exercise.

Knowing the way I operate and what motivates me, I've put a weekly tracker in my planner to keep track of the days I exercise, and I've made it a goal to do a 10-minute workout every day. If you're like me and you're looking for an easy way to get started, here's one of the videos I've been using- I have a rotation of 3-4 workout videos that I rotate through and they have been a good level of challenge for me where I am right now.

2. Screen time

I'm sure I'm not the only one whose screen time shot through the roof, especially at the beginning of the pandemic. And I know I don't have to explain to anyone the negative impact of too much screen time, or the addictive nature of screens and social media. This summer I'm really trying to reduce my screen time closer to pre-pandemic levels. Obviously I do a lot of work online with Organized Chaos, and right now I'm also in the middle of an online degree program, so a certain amount of computer work is unavoidable. But I'm focusing on that scrolling time on my phone that I've gradually allowed myself to increase during the pandemic. It was a way to stay connected when we were all isolating, but with that need being reduced I need to find ways to back off. 

One strategy that was effective for me years ago that I'm bringing back is wearing a wrist watch. I use the excuse of checking the time as a reason to check my phone constantly, so having a watch takes away that need. I'm also trying, any time I feel like lounging around scrolling through social media or watching YouTube videos, to turn on some music to sing along to instead. It still gives me a way to unwind and relax without having to stare at a screen.

3. Cooking

I've actually been pretty good with keeping up my meal planning/ healthy cooking for my family through the pandemic, and in many ways I've gotten better at using what I have in the fridge or pantry because I was trying to make fewer trips to the store during lockdown (read about that in this blog post). But what I have let slip is my eating habits when I'm alone. Since I share custody of my daughters there are days when they are with their dad and I'm alone, and I've found myself turning much more to convenience, whether that's instant ramen or takeout, with the excuse of "self care". This summer I'm trying to set myself up to cook for myself more with these strategies I had developed pre-pandemic. 

4. Appointments

I definitely let a lot of my annual checkup and other appointments go by the wayside during the pandemic. Part of my "self-care" this summer is getting back on track with all of my appointments! I have my annual checkup with my primary care doctor, dentist and eye appointments, and haircuts all on the schedule and I'm recommitted to staying on track with these.

I'm mostly writing this post because I know if I tell other people I'm doing it, I'll be more likely to follow through and stay committed. But I hope this also helps give other teachers some fresh motivation or inspiration to give your own home life a reboot! After living through everything we've been through in this pandemic- as much as we're not out of the woods yet- I think we all need it. 

If you're in a similar place in life where you're ready for renewal, I'd love to hear what you're committing to, changes you're making, pre-pandemic practices you're bringing back, and new habits you're trying to build. Tell me what you're doing in the comments below!

Monday, April 27, 2020

Surviving Quarantine with Kids

To be perfectly honest, last week was pretty rough for us. I think my 8 year old daughters and I all just hit a certain breaking point and there were lots of tears, tantrums, and arguments. No matter how hard we try as parents, there's no getting around how tough this situation is for everyone. Today I want to share some ideas I'm trying to make staying at home a little more bearable.


1. Find Holidays

I realized that our best days were the ones when we had something to celebrate, whether it was a holiday or birthday or school spirit day. It breaks up the monotony, helps inspire ideas for things to do when we're bored, and gives us something to look forward to. So I hopped on the internet and looked up what holidays were happening each day this week and picked out one for each day that I thought would be fun for us. For example this week I picked:

Mon 4/27: National Tell a Story Day
Tues 4/28: National Superhero Day
Wed 4/29: International Dance Day
Thurs 4/30: National Bubble Tea Day
Fri 5/1: School Principal's Day
Sat 5/2: National Fitness Day
Sun 5/3: National Two Different Colored Shoes Day

Of course some days there will be *actual* holidays, but having these frivolous holidays to look forward to has me excited already! We may not actually do anything with them every single day, but we can if we feel like it, and that is enough.

2. Lists

Of course it should come as no surprise to see list-making as a coping strategy from me! There are so many ways lists can help. I made lists for my daughters of all their assignments they have for distance learning, plus a list of activities to choose from to get them off the computer in between each assignments (you can get a copy of my lists and read more about how we do that in this post).

We've also started making lists, on days when we have more free time, of things we'd like to do. We sit down as a family and we compile all the ideas that each of us has. Some of mine are things we *should* do, like laundry, but the rest are things we've thought about that would be fun. This is something we did on occasion before quarantine and it's really helpful for avoiding the frustration that can come in the afternoon when young children realize they missed their chance to do something they had hoped to do but never voiced. Seeing the whole list and talking through possible ideas for the day prevents the "I'm bored" moments, encourages my daughters to communicate more proactively, and gives me the chance to help them manage their time so that we're all more likely to be able to do the things we're hoping before the end of the day.

3. Virtual Play Dates

Getting together with their friends has been one of the biggest things my daughters have been missing since schools closed! But the truth is, young children don't do very well with video or phone conversations. Most of the time it's just awkward silence! The key, I've found, is to have pre-planned group activities. Our most successful virtual play date so far has been a game night with another family. We played charades and scattergories, and the game where you have a collection of items in front of the camera, one side closes their eyes while the other side changes something, and then they have to guess what was changed. Of course there are other fun games that would work over video conferencing, but those all worked really well with our elementary age children!

This situation is not easy for any of us, but I hope these ideas help you find some inspiration and joy amidst the stress. I've written other posts already about managing online learning for children, setting up schedules, meal planning, and more- don't forget to check out my centralized page for all things closures both at home and as a teacher: