Image Map

Wednesday, April 29, 2015

Giveaway!

Guess what?!? I've gotten together with a bunch of music sellers on TeachersPayTeachers to give away TWO $50 gift cards!!

This is perfect timing to stock up on stuff to survive the end of the year, or start getting ready for next year! I'm linking up with Music With Mrs. Tanenblatt to share some of my picks to use all this free TpT money on :)

Middle School Music Interactive Notebook

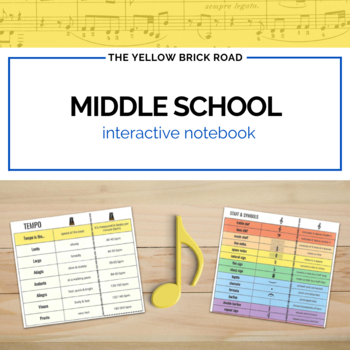
I bought the K-4 interactive notebooks from The Yellow Brick Road a long time ago and I love them. Now Jennifer has gone and made some seriously wonderful updates to them, and I now really want the rest of the set! I teach K-6 so it would be awesome to have these for my older students. These interactive notebook files have saved me so much time. I put some of the pages into a notebook format, but I use many of them for assessments and worksheets separate from the notebook as well.

Flags of the World: 270 World Flags - Clipart Set

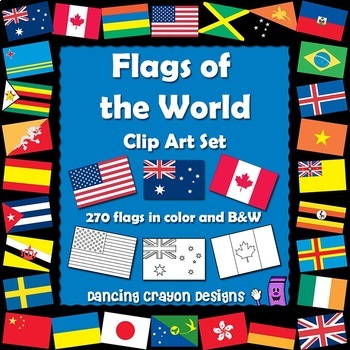
I am thinking of updating the visuals I use for introducing my overview of world music, which I do each spring with every grade K-6. This set would certainly simplify the process! I love that the files are already labeled with the country name. It would make it so much easier to find the flag I'm looking for.

Spring Songs Music Listening

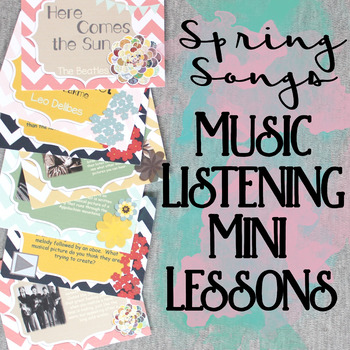
My students and I always love the lessons I've used from Cori Bloom. This set for Spring looks amazing as usual!

Music Teacher Entire Life Planner and Organization Binder:

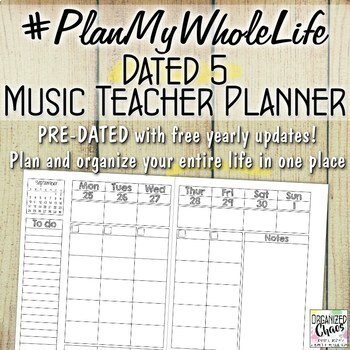
Last but not least: here's a product from my own store that I'm excited to share with you! This week I shared my own planner for the coming school year (if you missed those posts scroll down or click on the "planner" label in the side menu). I have worked so hard on these planners and mine really does make a huge difference in my ability to stay organized!

Ready to win some free money to buy out your own TpT wishlist?? Entering is simple- go to each TpT or Facebook page and follow for an entry. Ready? You have until midnight EST Friday night, May 1st, to enter!!

a Rafflecopter giveaway

Tuesday, April 28, 2015

Planner Tour: 2015-2016 teacher and home planner

I am so excited I can hardly contain myself: my 2015-2016 planner is printed, assembled, and ready for use! I have been working hard on updating my planner for the next school year for months now, and I am so thrilled with the results. It may seem early to be talking about next school year, but I use a lot of my summer to plan out the upcoming school year, so I knew I wanted to have it printed and set up before the mad dash to the finish line got underway.


I decided this was the perfect time to jump into my first video, since there is so much to show you inside my planner. Sorry the quality isn't as clear as it should be- I promise I did my best! I have a lot to learn about video-making. In the meantime I hope the video is helpful and gives you a good sense of everything I have in my new planner!


Yesterday I shared how I set up my planner, including the binding system and accessories I use. If you missed it, you can check it out here:


The 2015-2016 line of planners is posted in my store as well! You can get the whole shebang like me or just get one or more sections, depending on your needs. I'm super excited about them! You can get the exact one I have (with several other pieces, like seating charts, recorder karate records, and a music classroom inventory spreadsheet) here:

Monday, April 27, 2015

How I Set Up My Planner: 2015-16 teacher and home planner

Guys, I can't even begin to describe how excited I am. I have my 2015-16 planner printed and in my hands!! Although I'm going to be deviating slightly from my usual "Mommy Monday" and "Teacher Tuesday" posts this week, I decided to share these posts in these slots because my planner is THE single most important thing that I use to organize my life at home and at school. So this week both my Monday and Tuesday posts will apply to both Mommy-ing and Teaching :D

I loved the planner I made and used this school year (so much so that my very first post on this blog was all about that planner!). I didn't think it was possible, but I love my new planner is even more!! A lot of the basic format is the same, but I've streamlined the inside, made a bunch of cover designs that all coordinate with the rest of the planner so they are interchangeable, added some new pages, and even figured out how to have laminated tabs! :) I'll be giving you a tour of the inside tomorrow, but today I wanted to talk about how I set it up to make the most of my all-in-one planner.


I have my pages printed on 28lb paper- the rest of the planner creation I do at home. I am still deeply in love with the arc notebooks from Staples. Having the flexibility to move pages around like a 3-ring binder while still laying flat like a spiral-bound notebook is just unbeatable, in my opinion. And because I completely DIY the inside, and use this cheap hole punch from Levenger, it is extremely cost-effective. See how nice it is?


(Side note: the rings in the picture are a little bigger than the ones I regularly use because I'm still using the smaller ones on my current planner.)

I used the same paper tabs as I did this past year. I love the colors and how easy it is to replace if they wear out or you want to change the labels, but they were definitely a bit flimsy. So this year I laminated them! I just used a single-sided laminating sheet. Double-sided lamination won't work for this because you need a complete seal for the lamination to stick and you don't want to laminate over the sticky (and repositionable!) part on the back of the tabs.


I actually use the single-sided laminating sheets for some of my planner pages as well, for things like cleaning checklists that I want to be able to re-use several times, I laminate the page and use a wet erase marker to write on it. The ink comes off easily with a wet paper towel but won't rub off from the other paper. Since the sheets are slightly bigger than the 8.5x11 paper, I had enough space to laminate my tabs on the same sheet, then just cut around the paper and the tabs and voila! I also re-punched the page after I laminated it (which my cheap-o punch handled just fine).

I also have a pen loop and zippered pouch at the back of my planner. I have used both this year and they have held up really well. I keep some blank cards and postage stamps in the pouch, and any time I get a handout in a meeting and don't know where to put it, I throw those in there too. Super handy! The small blue clip in the picture is magnetic. I found some at Walmart on clearance earlier this year and they are awesome! I keep the current month clipped with the current week so I can easily flip back and forth, since those are the pages I tend to use the most often.


Two more things and then I promise I'll stop gushing! :D

You all know how much I love my washi tape. Besides being colorful and fun, it's strong and repositionable- perfect for things that I want to keep in my planner but be able to change out too! I print a copy of my class schedule and district yearly calendar separately and tape them into my planner with washi tape. Inevitably those calendars and schedules tend to change, so this way I can easily change it out when that happens. Plus it adds that little punch of color!

In my recipe section, I have some of these self-adhesive pockets. I keep some of my staple recipes written out on small cards and keep them in those pockets, which are stuck to the pages of the planner. I was unsure of how well they would stay in the pockets, but I have not had any issues with paper falling out this year, so I'm sticking with the same system this year.

That's about it! Putting your planner together is a very personal thing that depends so much on your style, your life, and your needs. Hopefully you got a useful tip or two from my list! I'd love to see and hear how you have "tricked out" your planners as well :) Don't forget to come back tomorrow to see the inside- SO EXCITING!! :D (**updated: check out the complete tour here!)

Tuesday, April 21, 2015

Teacher Tuesday: centers as music class incentives

I'm returning to the topic of behavior management today to tell you about the incentives that I use in my classroom. I have already written about my individualized system that I use to reinforce positive behavior with "happy notes"- you can read more about those in this post (and you really should, if you haven't yet, because those little notes have made a huge difference in my classroom!). Today I want to tell you about a new whole-class incentive I have started using this year. 


I believe that one of the most important things that we as music teachers can teach our students is working cooperatively (and the interdependence that comes from that). Music is one of the only school subjects that truly requires students to depend on each other in order to succeed. I try to take advantage of every opportunity to emphasize that aspect of my classroom, because I think it is such an important life skill and they get so few opportunities to practice it!

To that end, although I have several systems for dealing with behavior individually, I emphasize the whole-class behavior management systems the most, encouraging classes to work together towards a common goal. You can read more about how my system works in my posts on behavior management, but basically each class earns points for their behavior each class period, and when they earn a certain number of points they get a prize. There are 3 levels of incentives: the first 2 are centers that I choose, and the 3rd is a free choice "party". 

The first 2 times that the class earns the incentive, we use the next class period to do centers. I use centers in my regular lessons as well, but I use them sparingly. For their reward centers day, I usually incorporate a couple of centers where I know they will be practicing content skills, and the rest encourage them to enjoy music in different ways. Out of all the ones we have used, here are some of my students' favorites:

One of the most popular is the listening station, where students can pick their favorite songs from my preset list on the computer. This is different from the usual listening station, though, because there are no headphones- they listen to it through the speakers. I have a second center nearby that is a dancing station, and the listening station students do double-duty as DJ's for the dancers as well. The dancers are not allowed to give input into the songs the choose, so it makes for some funny moments and the kids think it's tons of fun. Kaboom sticks are another popular station, and I usually have a couple of iPad stations. You can read more about those in my previous posts on centers, but these are great ways to incorporate some skill practice while still keeping it fun.

I used to use only free choice parties as my whole-class incentive, but using centers days as rewards has allowed me to infuse a little more meaningful learning into the reward time, which makes it easier for me to give them more frequent positive reinforcement- it's a win-win! Do you use centers as a reward in your classroom? How do you do it? Share your ideas and experiences below.

Monday, April 20, 2015

Mommy Monday: updated art corner for preschoolers

I'm excited to share a quick, easy, and super-cheap update I made to my preschooler girls' art corner!


Let's take a look at the "before":


Obviously, the only change I made was to add the containers hanging on the wall, but let me tell you, it has made a huge difference! Two things changed since I first had everything stored in the tub under the table: as the girls got older, they 1) acquired, and became more interested in, lots of different coloring books and 2) decided they liked mixed-media projects (well, one of my girls especially). Inside that tub, I had everything organized in different containers by type, with a little space for different kinds of paper:


This system just wasn't working for us anymore, though, because the girls would inevitably dump out all three containers so they could use 2 pencils, a marker, and 5 crayons, and the tub was just getting too crowded (and, honestly, we were at the point of keeping overflow on the floor next to the tub) because of all the additional coloring books etc that the girls were using.


The containers on the rails solve both of these problems. Obviously, getting the writing implements out of the tub makes them easier to access and frees up space in the tub. I actually was also able to bring in the pipe cleaners, which were in a haphazard pile with some other toys before!

But the part I'm really excited about is the container you see on the far left of the picture above. Notice anything?!? That's right, I have crayons, pencils, and markers all mixed together in the same container (*gasp*)! I have two of these, actually- one for each girl. I labeled those with a name sticker so they will know whose is whose.


Because these containers pop right off the railing, the girls can now take one container and just use that, instead of dumping out every single container to get what they need for one picture! I also won't have to deal with the arguments over who is using the green crayon anymore, since they each have their own (I always have had 2 of each color for this very reason- they just couldn't find or keep track of them before because they would rather argue than look through the pile for the color they want...). Whether or not this will actually continue to happen in practice? Only time will tell, but for now I'm excited about the results :)

If you're interested in setting this up yourself, the rail system is super-cheap at IKEA. This is the rail I used and these are the containers that fit on the rails (they have them in several colors). I spent a total of $12 on these things!

What do you use to organize your art supplies? I would love to hear your ideas!

Tuesday, April 14, 2015

Teacher Tuesday: lesson ideas for teaching rhythm

Welcome back to Teacher Tuesday! Today I'm sharing my favorite ways to teach rhythm in a full-class lesson setting. Obviously rhythm is something that comes up in almost every song that we learn in class, but these are my favorite activities to use when we are really focusing on a particular rhythm.


1. Ostinato Composition

I think of composition just like writing in any other language: it is the highest level of skill development (just like we speak, then read, then write in our native tongue). So the best way to practice a musical element (and assess student understanding) is to use it in composition! One easy way to do this is to have students add an ostinato to a familiar song. I usually pick a song we have recently learned that they know well and love, and tell them to create a 1-measure pattern to add to the song, using the rhythm we are learning somewhere in their pattern. I usually have them create the rhythm in small groups by clapping, or individually by writing it down, then have them choose a percussion instrument to use with the class. Sometimes we perform the song in a "theme and variations" format, where we sing the song over and over while one group or student at a time performs their ostinato as an accompaniment, or we will put all or several of the ostinati together to create a more complex, layered accompaniment. With older students I throw in some higher-order thinking by asking students to choose an instrument that fits with the overall message of the song, and after the performance, I have the class discuss which ones best fit with the piece. Another extension is to transfer the rhythm to xylophones or other pitched percussion!

2. Rhythm Chairs

Split the class into two groups, with each group in a line leading to the front of the room, where you will be displaying a 1-measure rhythm (on a projector screen, whiteboard, or even flashcards in your hand). At the front of each line, put 4 chairs going across, facing the front of the room. Tell the students that a person is a note, and a chair is a beat. They need to show you whatever rhythm they see. On your signal, show the first rhythm. The first team to get the correct number of people in the correct chairs wins that round- if there are two eighth notes on a beat, two people share one chair, a quarter rest would be indicated by an empty chair, and they would show a whole note with one person laying across four chairs etc. The best part of the game is making them figure that all out on their own without any additional instructions! This game has been a real aha moment for many of my students, and boy is it fun! I've been doing this game with just 1-measure rhythms projected on the screen, but Jennifer at The Yellow Brick Road has an awesome file, including game instructions and rhythms to use in the game, in her store here:

Rhythm Chairs Bundle

3. Rhythm Battle

I use this as a special activity during Music In Our Schools Month (read more about the things I do for MIOSM here), but you could definitely pull this out any time of year!I choose a song with a clear, stead beat- usually the instrumental version of an upbeat pop song to rev them up :) After the music starts, I put up a slide on my projector that says "Rhythm Battle!". When the intro is ending, I count off 4 beats and click to the next slide on "four". There is a 4 beat rhythm on that slide. If the class claps it correctly, I click to the next 4-beat rhythm slide on the 4th beat, and they have to continue clapping with no pause. They keep going until they make a mistake. When they mess up, they go back to the first slide and start over. Whatever their longest run is before the song ends, that is their class score for the day.  For MIOSM I keep a running tally throughout the month and the winning class from each grade level gets a prize. The competitive aspect definitely makes it more exciting, so I recommend running it as a competition between classes, but you could also set a goal for a certain score and work towards the goal. This is by far the best activity I have found for improving sight reading, and the kids beg for it every year! Here are the slides I use if you're interested- you can also easily make your own slides to fit the level of your students or even use flashcards if you have those.

I also do a lot of focused practice on rhythm concepts in small groups/centers. If you missed my post last week on center ideas for teaching rhythm, go check it out here:


Monday, April 13, 2015

Mommy Monday: what to get a single mom for her birthday

So today is my birthday! Happy Birthday to me!! :D

I am off spending the day with my family so I'm sticking around for long, but I did want to share something that my parents have started doing for me for my birthday that I LOVE and I think almost all single mothers of young children would appreciate:


take their kids shopping. Go to the dollar store and let them each pick something out to give to their mom. Help them wrap it and hide it somewhere to give to them later. In most two-parent homes, the other parent will make sure the kids get the other parent a small gift or make a card. Parents love getting those little things from their kids on their birthdays, and we also want to encourage our children to learn about the joy of giving. But when you are the only parent, it can be awkward to encourage your children to get something for your own birthday.

It's a simple thing but I really love getting something that I know my girls picked out for me!

Have a wonderful day, everyone!

Tuesday, April 7, 2015

Teacher Tuesday: center ideas for teaching rhythm

In the next few weeks I want to share some of my favorite ways to teach rhythm. Today, I'll be focusing on ideas that I use in small groups or centers. I have had a few times this year when a class, after going through the usual lessons to learn a new rhythm, just isn't getting it. I have spent an entire class period working in centers to reinforce that rhythm with the whole class. Centers are great for this kind of situation because students get to practice the skill over and over again without getting bored, and they are able to work on it in a variety of learning modalities to fit their learning styles.


1. Rhythm Cat app

My students love this because it works like a video game where players can "unlock" levels by getting a high enough score. Basically students tap the green button with the rhythm on the screen to "play along" with the music (so they have to stay on the beat). Word of caution: the notes turn green if you play it correctly, which looks initially like it is telling you to follow along and play that note. Make sure to explain to students that the green notes are the ones they already played so that they don't get lost! There is a free and paid version. I've been using the free one and it is completely adequate. Click on the picture to check it out!

2. Kaboom sticks

This is another very popular activity. Basically the sticks with rhythms on them are in a container, writing side down. Players pull out a stick and clap the rhythm. If they are correct, they keep it. If not, they put it back in. Some sticks say "kaboom"- if they get that one, all the sticks go back in the container (except the kaboom stick). The player with the most sticks at the end of the game wins. This is great because you can really focus on a specific rhythm. I have several sets of popsicle sticks each with a different rhythm focus (held together with rubber bands) in the container so I can quickly pull out the ones I want. I also use this for teaching note letter names- you can find that post, which also has a link to my original source for this idea, here.

3. Cups

This is an activity that you can quickly pull out with minimal setup- all you need is a set of sturdy cups. Give each student a cup and ask them to come up with a pattern, similar to the "cup song", incorporating one rhythm element that you want to practice. You may want to give a few examples, either through live demonstration, or by showing some examples on YouTube, to get them started, but my students have been pretty good at coming up with their own ideas without a lot of prompting.

4. Paint chips


I adapted this idea from this post from Teach Piano Today. Grab some paint chips from your local hardware store and laminate them.  Give students a dry erase marker and have them notate the names of the paint colors in a 2-beat rhythm. So, for example, "Pineapple Soda" becomes 1-&-a-2-& (or ti-tika ti-ti). Take a quick look at each of the paint colors before you use them in class though- you don't want anything provocative, too difficult to pronounce, or the wrong length. This is fun because the color names are usually pretty funny and the students have saying them over and over again while figuring out the rhythm.

What are some of your favorite small group activities to teach rhythm? I'd love to hear your ideas in the comments! 

Monday, April 6, 2015

Mommy Monday: interactive meals for family fun

Today I want to share with you a mealtime favorite in my house: what I call "interactive meals". Basically I'm talking about a meal that requires participants to make choices and customize their dish at the table. I have found these meals to be perfect for toddlers, because it gives them control over what they eat without becoming a short-order cook, and a great way to make meal time more fun by giving everyone more involvement beyond just consuming the items that appear on their plate. These meals are perfect for the weekend when you have a little more time to relax at the table and enjoy each other's company, but they're not so involved that you couldn't whip it up on a weeknight if you wanted!


The basic idea is to have lots of options for what people can add to their plate, and put them all on the table. Sort of like a buffet but everything is right there in front of you. The sky is the limit on what kinds of meals you could put together along these lines, but here are our top 3 favorites at the moment:

Salad Bar

This is a great way to eat lots of veggies. So colorful and perfect for warmer weather! 

Ingredients: at least 1 leafy green
                    several chopped vegetables
                    other toppings: fruit, cheese, nuts, hard boiled egg, bacon bits, beans...
                    salad dressing

I usually pick either the savory or sweet side and stick with those to avoid getting too weird. For sweet salads, berries, feta cheese, nuts or seeds, and vinaigrette make a great combination. For savory, hard boiled eggs, shredded cheddar cheese, black beans, and bacon bits work well together. Our favorite veggies at the moment include bell pepper, cucumber, carrot, corn, avocado, and spinach.

Taco Night

So much fun. Use scrambled eggs instead of meat to make it for breakfast!

Ingredients: tortillas (we use the flour fajita ones)
                    meat (chicken, ground meat, shrimp, steak, fish, or even scrambled eggs)
                    salsa
                    shredded cheese
                    vegetables (avocado, canned corn, black beans, spinach, bell peppers...)

I love this meal because I can keep most of the ingredients on hand. One thing I have learned is to let my toddlers eat it however they want and not try to show them how to roll up their tortilla (unless they ask). One of my girls puts everything on a tortilla, then eats it all with a fork and eats the tortilla by itself at the end. Whatever floats your boat, I guess!

Pancake Breakfast

We do this most often with french toast, actually, or you could do the same with waffles. 

Ingredients: pancakes/waffles/french toast
                    fruit (berries, mango, banana, kiwi...)
                    syrup/honey
                    spreads (peanut butter, jellies/jams, butter, cream cheese)
                    other toppings: whipped cream, cinnamon sugar, bacon bits, chocolate chips, nuts

This is something that probably almost every family in North America has from time to time, but the fun is in coming up with new toppings to try (and combinations of toppings!). One of my toddlers pulled cream cheese out of the fridge one time- you guys, cream cheese is amazing on french toast! I don't know why it isn't a staple pancake topping already but it is great with fruit and nuts. 

What meals have you tried to make meal time more interactive for the whole family?