Image Map
Showing posts with label Kitchen. Show all posts

Monday, July 31, 2023

3 Fridge Organization Items

We're continuing the home organization projects with the fridge today- no, there are no clear stacking bins to color coordinate your produce like all the beautiful fridges I see on social media these days, but I do have a few super practical, inexpensive items I've added to my fridge that have made it so much easier for me to keep everything accessible and easy to find in my refrigerator! 

This post contains affiliate links

1. Turntables

I saw these at IKEA and got so excited- rectangular lazy susans! Why didn't we think of this sooner?!? I've seen people use regular round lazy susans in their fridge to make it easier to reach and see things, but I never liked the way it wasted space in the corners- it's truly a round peg, square hole. But these have the same functionality of regular lazy susans with the added benefit of fitting the rectangular fridge shelves, leaving no empty corners. I know IKEA changes out their items pretty often, so if you can't find them there this one seems to be similar.

2. Hanging Drawers

Not only do these function as, essentially, an additional shelf, but because they are drawers they are perfect for the kinds of things that would normally roll around on a shelf. I usually keep a few rolls in a can on hand, and these drawers fit those perfectly. 

3. Egg Storage

OK this is probably the one thing on this list that is not entirely necessary, but I actually love it for multiple reasons:

  • I can easily grab the eggs I need without having to take out the entire carton
  • I can easily see how many eggs I have left without having to take out the entire carton to check every time I'm making my grocery list
  • It freed up shelf space

Here's a video to show you how each of them works:

They're nothing earth-shattering but they really have made my fridge so much more organized! If you want to see other organization tips and items for the rest of the kitchen, be sure to check out this post:

What do you use to organize your fridge? Let me know in the comments!

Monday, June 26, 2023

3 Kitchen Organization Tools and Tips

After moving into my new house recently I've been working in getting everything organized, and the kitchen was definitely a top priority! Today I'm sharing 3 of my favorite organization tools that have made a huge difference in my kitchen organization without breaking the bank (don't miss the last one, it's definitely my current favorite!).

This post contains affiliate links which help support this page


TIP: group like items together

I never had wide drawers in a kitchen like I do in my new one, so this was a new problem for me that required new solutions! To take full advantage of the drawer space I quickly realized I needed a way to divide up the space to keep items from sliding around into one big jumbled mess. Yes, smaller bins can serve a similar function but I like these better for bigger drawers that need bigger sections- these ones I found are adjustable and they were super easy to install (plus they fit my tight teacher budget).


TIP: similar sized containers maximize storage space

I know. I never thought I would be one of "those people" taking spices, or anything else for that matter, out of its original container just to put them in another container... but when my pantry space was at a premium and I was trying to find a way to fit everything in, I realized what a space saver this was. I wish I had the foresight to take a "before" picture but just imagine a typical collection of spice bottles of all different shapes and sizes- I was only able to fit about 2/3 of these into the drawer before I got these, just because they don't fit neatly next to each other when they're all different sizes and shapes. AND having them in a drawer like this has made it so much easier for me (and for my daughters) to find what we're looking for. Before I had some on a pantry shelf and some on a rotating spice rack I bought as a set, and the labels were all different so it took time to read and find what I wanted, especially if it wasn't something I used regularly. So much easier now, and it's a lot easier to see how much I have left of each one when they're all laid flat. For my most-used spices that I buy in bulk sizes, I filled up these smaller bottles to keep within reach and stored the extras on a top shelf so I can refill when needed.


TIP: avoid overcrowding a container to make things more accessible

These are by far the best thing in my kitchen and also the cheapest and easiest to install! I can't recommend them enough. They stick to the bottom of the upper cabinets and spin around so you can see and access any of the 6 hooks. I'm sure I'm not the only one who has always had a vase sitting on the counter holding all of these spoons, spatulas, and whisks- these are always the things I reach for the most when I'm cooking and often am trying to grab quickly after realizing the food was going to burn if I didn't get it out fast! The vase made it hard to find things, especially the ones with shorter handles, and it was completely overcrowded. I had to strategically wedge things in to get them all to fit! Now I can see everything and grab exactly what I need without rearranging the entire container to get to it.

I have more tools and tips to share from my kitchen but this post will get too long if I keep going! Let me know if you're interested in a "part 2" with more favorites, and let me know what other spaces in the house you'd like to see next, in the comments below.

Monday, April 20, 2020

Quarantine Cooking: Tips for Managing Meals

One of the biggest challenges with this whole stay at home situation is all the cooking! And as we try to avoid going out in public where we can, planning ahead to avoid frequent grocery store trips has become a necessity. This is also the perfect time to get the whole family more involved in the kitchen since everyone is at home! Here are my tips for planning out meals and minimizing shopping trips, and getting children- no matter their age- more involved in cooking.


1. Meal Planning

If you weren't a meal planner before I'm betting you are now! I've been meal planning for years now and it truly does not have to be complicated. The key is to have some reliable recipes on hand, know how to be realistic when you are choosing your meals, and getting organized before you go to the store (or order your groceries). Here are some specific tips for simplifying the meal planning process so you don't have to stress so much over what to cook or what to buy.


2. Family Cooking

There is no reason for one person to be shouldering all the cooking responsibility for the whole family when everyone is home, and this time while they're not at school is perfect for introducing some kitchen skills to kids! My daughters have been helping with cooking in some form or fashion since they were very young, and now they are each in charge of one dinner per week, from planning to cooking. Here are my tips for getting kids involved in the kitchen:


I also highly recommend getting everyone involved in the planning process for other meals, even if they aren't cooking. I don't have my daughters cook more than one meal a week, but I do have them pick out one breakfast each week as well. Half the battle for me is just coming up with ideas for what to eat- meal planning systems help a lot with that but having others share in the decision making is so helpful.

3. Use What You Have

One of the biggest epiphanies for me during this time at home has been the realization of how much food I have laying around. It's a little like looking at a full closet and lamenting having "nothing to wear"- I have all these staples that I keep on hand that I don't really count when I'm looking at what I have available for next week's meals. I've been trying to start limiting my grocery store trips to every 2 weeks instead of weekly, and it has been a lot easier than I thought! Here's what has worked for us to make this happen:

  • I still only plan 1 week's meals at a time. My brain can't handle that much decision-making at once right now to plan out 2 weeks of meals. So before my grocery store trip, I plan out the week's meals with my daughters and make a list of what I need for those meals like I normally would. 
  • When I go to the store, I pick up a couple of extra fruits and vegetables that will last longer, like sugar snap peas, potatoes, melons, etc. If we're getting close, I might grab an extra milk or carton of eggs. But otherwise I just buy for the 1 week we've planned.
  • For the 2nd week my daughters and I come up with meals using what we have left. It has been amazing to me to see how much we can make with the random stuff we have left in the pantry and fridge! The first time we did this I truly thought we would be eating scrambled eggs and mac and cheese all week, but actually we ate different meals every day and it wasn't that difficult to come up with ideas. 
  • I normally save leftovers from dinner to take as lunches to work. Now I freeze the leftovers instead. That gives me another dinner I can pull out in a couple weeks! 
I'm compiling all of my posts related to school closures/ stay at home social distancing for school and home in one place to make it easier to find. Be sure to head over there for more:


I hope these ideas make quarantine cooking a little less stressful! Stay safe and happy cooking :)

Monday, June 18, 2018

Meal Planning 101: weekly shopping trips

Meal planning can be a game-changer if you set up a system to make it streamlined and effective! One of my favorite things about meal planning is being able to go to the grocery store just once a week and never having to making an extra stop in the middle of the week. Here are my tips for making sure you never run out of groceries mid-week again!


There are two categories of foods that I need to shop for at the grocery store: staples and meal ingredients. My tip for making sure you have all of your meal ingredients is simple: 

Copy your ingredients from the recipes as you plan your meals.

Last week I talked about how to plan out your meals so that you are more likely to stick to your plan (read that post here). In that post I talked about a few different ways to save your favorite recipes, whether digital or hard copy. However you're saving them, whenever you're choosing your recipes and looking at them to make your plan for the week, go through the ingredients list and write down the ones you don't have. Save yourself the step of having to go find those recipes again later when you're ready to go to the store!

Staples are things that I don't have to buy as often but I need to make sure I have on-hand, like condiments, spices, bread, snacks, and drinks. Some of them I'll be able to check when I'm looking at each recipe's ingredients, but others are things we eat outside of mealtime and won't come up while I'm meal planning. That's why I suggest one other tip for making sure you have everything you need on your grocery list:

Keep a running list in the kitchen and add to it throughout the week.

I have a dry erase board stuck to the side of my fridge where I make my grocery lists. Throughout the week, if I notice we're running low on a staple, I'll write it down immediately. That way when it comes time to add my meal ingredients, I won't forget the staples! I love using a dry erase board for this because it's easy to make accessible in the kitchen where you can write it down as soon as you notice something. Remember if you don't have a regular white board, you can use a picture frame for the same purpose! 


Bonus tip: keep a magnetic list pad on your fridge for your shopping lists as well.

As you can see in the picture, I keep a magnetic list pad right next to my dry erase board. Once I've written everything down on the whiteboard, when I'm ready to head to the store I transfer the list to the notepad, splitting everything up into categories so it's easier to find at the store. Very handy!

I hope this helps you see how easy it can be to make a meal plan and stick to it- I absolutely cannot imagine not meal planning at this stage of my life! If you have any questions about meal planning or tips of your own for making one trip to the grocery store each week, leave them in the comments below :)

Get more timely ideas and content sent straight to your inbox each month by signing up here for the Organized Chaos Newsletter.

Monday, November 6, 2017

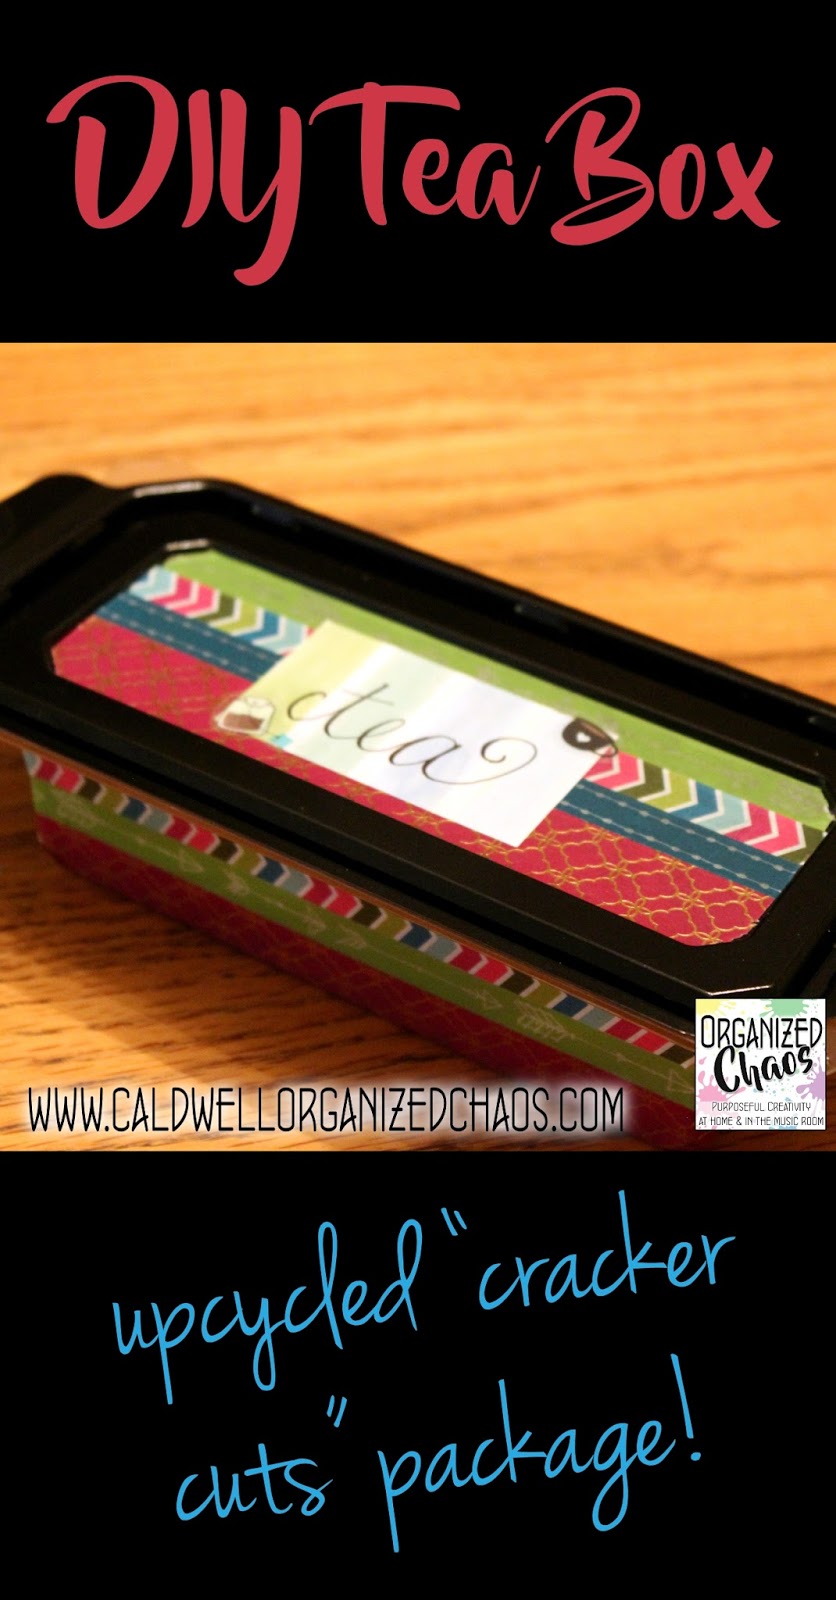
DIY Tea Box

It's been a while since I shared a quick and easy DIY project, so I'm excited to have another fun one to share today that's perfect now that the weather is getting cooler: a DIY tea box! Even better, this is a simple way to upcycle something you would otherwise throw away, so it's a great way to do a little planet saving too :)


I am a hot drink lover. Whether it's hot chocolate, coffee, or tea, I love it all! So naturally I have a bit of a tea collection in my pantry. That's all well and good when it's just me, but when I have guests over it can be pretty cumbersome (and overwhelming) to pull out 10 different boxes just to offer them a drink! This tea box solves that problem.

Another thing I love are those "cracker cuts"- cheese that is pre-cut into squares. They are so easy to pack in lunches and they're great to put out as a no-fuss appetizer or a quick snack after school. So I started accumulating these nifty long, rectangular plastic boxes that the cheese came in- I knew there had to be a way to reuse them!

Turns out, they are a great size for tea bags:


Besides the nice shape, these boxes also have a pretty good seal on the lid, so I can keep some of those tea bags that aren't individually packaged in there too- I just cut out a piece of the box so I know what type of tea it is, and stuck a few of each tea behind the cutout.

Honestly if you don't care about aesthetics, you could just rinse out the box, flip it over, and throw some tea bags in there. But of course I wanted mine to look a little more fun, so I cleaned off the original label and stuck some washi tape around the outside and on the lid. I put a few stickers on the top to write the word "tea" on the lid, and that's it!

I'm happy to have this little box on hand for the next time I have people over! Now to find some people to invite...... ;)

Join the Organized Chaos family- sign up for the newsletter right here!

Monday, May 15, 2017

Favorite Crockpot Recipes for the Busy Spring Season

Crockpots tend to get a lot of attention in the fall and winter, because it's a great way to simmer up warm and cozy stews, soups, curries, and more. But honestly my favorite time of year to pull out the crockpot is in the spring when, you know, everything in life seems to happen at once and my brain is in a constant state of overload. Here are some of my favorite recipes to simplify meal prep during this crazy time of year!


The nice thing about crockpot cooking is that you can throw stuff together in the morning and not have to slave over the stove when you come home exhausted in the evening. If it's a warm day, you won't be heating up your kitchen with the stove or oven either! 

Click on the pictures to go see the original recipes:

1. Salsa Chicken

This recipe is absolutely as simple as it sounds, and it's so versatile. You literally put some chicken in the crockpot, cover it with salsa, and cook it on low for 6-8 hours. That's it. When it's ready, I like to use it for a simple taco night (pull out some tortillas, shredded cheese, and canned corn and beans, chop up some cilantro and whatever other veggies you have in the fridge and let everyone make their own soft tacos) or add it on top of a simple salad for a quick lunch to take to work, but you could also use it as filling in a casserole, add it to some one-pot pasta, or use it as enchilada filling.... you get the idea. 

2. Honey Garlic Chicken


This another recipe where you throw in some chicken and a few ingredients to marinade and you're done. I do it with chicken thighs because I prefer it but it would work with breasts as well. When I come home, I throw some rice in the rice cooker and steam some broccoli, asparagus, green beans, or some other veggie and dinner is served! Everyone that tastes this chicken LOVES it- it's super yummy.

3. Baked Potatoes


This is the perfect example of something you don't want to make on a busy warm evening because it takes a long time to cook and it heats up the kitchen, but you can eliminate those two problems with the crockpot! Wrap the potatoes in foil, throw the in the crockpot, and let them slowly cook while you're at work without heating up your house. When it's time to eat, I pull out whatever toppings I have on hand: maybe some leftover cooked broccoli, bacon bits, shredded cheese, butter, canned beans, etc, and add some chopped cold vegetables like bell peppers or carrots or pull out a bagged salad. Done! And I always make a couple of extras to take to work for lunches.

Those are my top favorite recipes to make in the spring: all of them are easy to throw together in the morning, but aren't going to feel too warm and stuffy for a sunny spring day. For more crockpot recipes (I'm a huge fan), here's my crockpot Pinterest board :)

What are your favorite ways to save time in the kitchen this time of year? Share your tips in the comments below! Want more? Sign up here for the Organized Chaos newsletter and get ideas and resources sent straight to your inbox.

Monday, March 13, 2017

Dinner Recipes for Kid Cooks

I've talked before about how I got my daughters started cooking dinner once a week. When it comes up every now and then in conversation, the first question I usually get (after the initial look of shock) is, "What do they make?". Of course every child will have different levels of experience, fine motor skill, attention span, interest, etc, but I thought I would share some of the meals my daughters often cook (and have been cooking since around the age of 4). If you're looking for some ways to get your kids involved in the kitchen, these meals are a great place to start!

*this post contains affiliate links*

1. Tacos

Tacos are great because you can put almost anything in them, and the ingredients are easy to prepare. The girls put each ingredient in its own bowl and set everything out on the table so each person can make their own tacos. Add some tortillas and dinner is served!

Some of the ingredients my daughters often include:
Vegetables: avocado, carrots, spinach, bell pepper, canned corn, canned black beans
Meat: chicken (cut into bite size pieces and cook in a frying pan with some onion powder and/or salt), ground beef or pork (cook in frying pan with onion powder and/or salt), hot dogs (cut into bit size pieces and cook in a frying pan- yes this happened, and it wasn't as terrible as it sounds), shrimp (cooked in a frying pan- they only did this once but it was awesome)
Other: shredded cheese, salsa, cilantro

2. Sandwiches

The girls love making sandwiches to order- peanut butter and jelly, tuna salad, and ham and cheese are usually the choices, and they are easy for the girls to put together (once I open the can of tuna for them). They've recently started making grilled cheese as well! Usually the sandwiches are accompanied with some fruit and maybe a cooked vegetable too.

3. Macaroni and Cheese

Of course we can't forget the boxed mac and cheese dinners! There are some reasonably-healthy options out there now, so we stick to those brands, but the girls pretty much have this recipe memorized now and don't even need my help reading the directions on the box! This meal usually comes with a fruit and/or salad as well ;)

4. Meatballs

This recipe for baked meatballs is easy to put together- it's basically just meat, eggs, breadcrumbs, and seasoning. They love rolling the mixture into balls, and although they do need help getting them in and out of the oven, they can do the rest of the preparation themselves. These are usually served with dipping sauces (ketchup, bbq sauce, etc) and some sides.

5. Pizza

Although they can't quite get the dough stretched out enough on their own, the girls can do the rest of the pizza making on their own. This is another recipe where they can have fun with the toppings too, and a great way to get lots of vegetables in- the different colors from the vegetables make the pizzas more fun! ;)

Of course there are many other meals that they've made over the last couple of years, but these are some of their favorites that most kids can make (almost) all on their own! If you're looking for more kid-friendly recipes, my girls love this cookbook:


If you've never given your preschooler control of the kitchen, I highly recommend it. It's a great way to give young kids more independence and responsibility at home in a way that is fun and exciting! Read this post for more tips in getting started:


Want more ideas? Come join the family! Sign up here for the Organized Chaos Newsletter and get ideas and resources for home and school sent straight to your inbox.

Monday, August 8, 2016

Meal Planning Organizers for Every Meal

Now that back to school season is officially upon us, I'm rushing to finish up all of my summer projects to get my house organized and ready for another year! One of the projects I just finished is an update to my command center- specifically my meal planning systems. With a year of getting my kids to school under my belt, it was time for some updates to my systems! I'm happy with the way everything came out and I'm hoping these organizers will make our mornings a little bit smoother...


Let's start with the part that is the same: my dinner meal planner. I went into a lot more detail about this organizer in my post on my command center a few years ago- click the picture below to read more about it, including a tutorial on how to make one for yourself. It's still one of the best systems I have for organizing my home life and it's still working great! I'm hoping to update the recipe cards before the end of the summer to add some new recipes and take some out of the rotation, but otherwise I plan on keeping everything the same.


The rest, however, are completely new. Last year was my first year having to pack lunches every morning for my 4-year-olds, and I was slightly terrified. I created this system for lunch box menu planning that also allowed me to visualize how I was going to pack everything in their bento-style lunch boxes, and it was so helpful to have. If you're packing lunches for the first time and/or need a little extra organization to plan them out, check out my post on that system below:


With a year under my belt now, I don't really need to plan out the girls' lunches in quite as much detail anymore. I found that by the spring, I had a pretty good idea of how much food I needed to buy to last through a week of lunches and how to pack everything in their lunchboxes without having to plan everything out in advance. Still, I need a way to plan out what to buy each week for their lunches. Last year I made this visual, which I originally was going to use as-is:


But I've been slowly redecorating the house (we just moved in about 6 months ago) and I am hoping to paint the kitchen soon, so I decided to make something to match the color scheme better (you can grab any of these images for your own personal use- they are all 300dpi images and should print well):


Basically my plan is to circle the items from each category that I plan to use in the lunchboxes for the week and use that to create my shopping list. Then the following week, I can get ideas for other things to put in their lunches so I'm not repeating the same foods (which we all know is a travesty in the life of a 4-year-old!). I printed it out, popped it in a frame, and now I have a dry erase organizer for lunches!


Although I scaled back on my lunch prep organization system, I actually added one more: a breakfast menu planner.


I know it seems a little over the top, but hear my out. Breakfasts last school year were a problem. One of my girls would wake up every morning, ask what we were having for breakfast, and immediately complain about whatever it was. Even if she had requested it the night before. Also, we were always rushing because we have to be out the door by 7:10am to get to school on time, And lastly, one of my girls is now on a daily medication that she will be taking every morning for probably a few years, and it is a powder that is supposed to be mixed with something for her to eat. So yeah, breakfast needed some help.


I've decided to start having one grain/carb and one protein planned out and ready to eat at home, and pre-make a huge batch of smoothie to last us a few days and take with us in the car. I'll be able to mix the medicine in with the smoothie, and it will save us some time at home. I've included a weekly calendar on this organizer so I can plan out what we are having for breakfast a week at a time. I'm hoping that if I plan it out in plain sight, there will be fewer complaints about the menu selection each morning...? We'll see if it does anything. 


I guess this means I am officially ready for another school year, at least as far as food is concerned! Maybe in a few years I'll be a pro and I won't need any organizers to keep up with our meals, but for now I'm glad to have something to help keep me sane when all the craziness begins :)

Want more? Sign up here for the Organized Chaos newsletter and get music teacher ideas and resources for home and school sent straight to your inbox!

Monday, March 14, 2016

family chore chart

It is fairly common to have a chore chart of some kind for kids. I've seen so many different variations on Pinterest, and they all look super cute and functional. But where are the adults on those charts? I know they're doing lots of chores themselves. Many of them have their own cleaning schedules for themselves, either in a binder somewhere or hung up on a wall. But I am betting the kids either don't see it, aren't aware of it, or don't know what it is. And why have 2 different systems to achieve the same goal anyway? I've decided to create a chore chart that includes every member of our family, not just the kids, and I am loving it!


With my daughters now being 4 years old, I want to get them settled into the habit of doing more regular jobs around the house. At the same time, I have been thinking about ideas to update my current cleaning schedule for myself, because a) it is woefully inadequate for the new house in which we now live- the old one was created for our small apartment- b) I haven't been following it anyway, so clearly it's not working, and c) the chart itself was not very well-made and was starting to fall apart. That's when it occurred to me: I should combine these two things into one!


For us, the chart is quite simple because the girls have dinner at their dad's house on Tuesday, Thursday, and some weekends. So I created the schedule to only include the days that they're here: Monday, Wednesday, Friday, and Saturday and/or Sunday. I had just recently decided to start having them plan and prepare dinner themselves on Mondays, and they were already helping with setting and clearing the table, so it was easy to put those 3 tasks into a 3-day rotation for the weekdays (M is for Mommy, and S and L are the girls). If you want to read more about how it works having preschoolers plan and prepare an entire dinner on their own, click on the picture below:


Since we often eat on the go, with my parents, or otherwise do something special for meals on the weekends, I didn't schedule a particular person to do things for meals on the weekends. So far it has worked out fine- we basically do everything (cooking, cleaning up etc) together. Instead, I put some small cleaning tasks on the weekend (which for them is just watering the plants right now). I'm really hoping that this will help me be more accountable and stay on top of cleaning, since that has always been the hardest thing for me to stay on top of- I have always hated cleaning and I've never been able to find a way to really motivate myself to keep up with it regularly! 

What I know I love already, though, is the concept of a family chore chart instead of a kid's chore chart. I think it really helps to concretely show children how they are participating in what the entire family is doing, rather than making them feel like the parents are forcing them to do jobs because they are kids. I know most parents explain chores as a way of contributing to the family's responsibilities and talk to them this way, but I think having it clearly shown that way visually on the chore chart makes it much more real for kids. And it helps keep me accountable- the girls remind me of my chores too because they are looking at the same chart! And because I do help them with their "jobs" sometimes, by cutting things for their meals or helping them carry heavy dishes, they are more willing to help me with "my jobs" when I ask them as well.

I currently have the chore chart next to the rest of my command center. I'll eventually hang it on the wall with my meal planner and weekly calendar, but I am hoping to choose a color and paint the walls sometime soon so for now I'm just leaving it sitting on the counter. The nice thing about having it in a picture frame is that it's easy to change out if I decide to change the chores, and I can check things off with a dry erase marker and reuse it from week to week. Easy and cheap! :)


Have any of you tried creating a chore chart for the entire family? I am sure I am not the first one to come up with this concept- I'd love to see other examples and here how they have worked for your family, especially with different aged children. Leave a comment and share your thoughts!

Want more? Subscribe here to the Organized Chaos newsletter and get music teacher ideas and resources for home and school sent straight to your inbox!

Monday, January 25, 2016

Mommy Monday: preschoolers in the kitchen

So last week my 4-year-old's made dinner together (including planning the menu) on Monday, then took turns setting and clearing the table the rest of the week. The girls have been helping with getting out and putting away their dishes and even food prep for a couple of years now, but it was a big change for me to put them completely in charge of those responsibilities. I never imagined they could do it at such a young age, but so far we are all quite enjoying it, and it doesn't hurt that the girls are learning some important skills and values in the process! Here are my tips for giving your preschoolers more responsibility and independence in the kitchen.


Menu planning: give them categories, but let them pick

The first meal my girls settled on? Hard boiled eggs, biscuits (from a can), broccoli, and apple slices. Definitely not the kind of meal I would choose, but certainly not very unhealthy either. I found it effective for me to tell the girls that when you are making dinner, you are supposed to choose a fruit, a vegetable, a carb, and a protein (I explained what the last two categories were by giving them examples), and then letting them each pick the item for two categories. Breaking it down that way not only made it easier for them to come up with a full meal plan, but it also ensured that we were getting a relatively balanced meal. And although I will admit to grimacing a bit when they made their selections, I stopped myself from saying anything about what would taste good together or making any other suggestions. I think they felt a greater sense of ownership and responsibility from having come up with the meal plan all by themselves.

Cooking: set ground rules and then step away

It's hard for me to not step in when the kids are doing something in a messy or difficult way when I could easily show them how to do it "better", but if my goal is to give them more independence and responsibility, I need to let them mess up sometimes. They'll learn a lot faster by doing things and figuring it out on their own anyway! I told the girls in advance that I would do all of the cutting myself and I would help them turn on the gas ranges, but they would be on their own for the rest. I stayed in the kitchen and answered any questions they asked, but did not offer any unsolicited advice or assistance. You know what? They did great!

Dishes: make them accessible and replaceable

I have plastic dishes from IKEA in a low cabinet where the girls can reach them. No matter what kind of dishes you are using, there are two keys to getting kids to set out and clean up dishes independently: putting them where they can reach them, and being prepared for the possibility that they will be dropped. I've actually started letting the girls use the "grown up" dishes as well, but they are not super expensive ones, nor do they have sentimental value, so I don't have to be too stressed out about one of them breaking (or at least that's what I keep telling myself). Don't make them feel badly for dropping dishes if you're asking 4-year-old's to help. You want this to be fun, not stressful! If all of your dishes are too difficult to part with, pick up some cheap plastic ones to use until the kids are older.

Job distribution: share responsibilities between children and adults

One of the best things about giving young children more responsibility around the house is developing a sense of being an important, contributing member of the family. When I decided to start having the girls take more ownership in cooking and cleaning in the kitchen, I put together a quick chore chart that included their jobs and mine. It's a win-win really: they can see how we are sharing responsibility rather than being forced to do stuff while I sit around eating bon-bon's, and it serves as a cleaning schedule of sorts for me as well to keep me on track!


Have you set your kids loose in the kitchen yet? Let me know if you decide to try- I'd love to hear what works and what doesn't work for you!

Monday, August 17, 2015

Mommy Monday: lunchbox menu planning board

As a teacher, back-to-school season has always been an important time in my life. But this year I'm participating as a mom as well, and it is freaking me out!! My girls are 3 and will be starting full-time preschool in just 2 weeks. I know I know, it's *just* preschool, but just the fact that they now need backpacks alone is mind-blowing! I am excited for them in many ways, but there are going to be a lot of additional organizational challenges for me, with 2 kids going to school for the first time in 2 different classrooms. My biggest worry is the food. For the last 2 years, a wonderful lady watched the girls in her home during the day, and she fed them both breakfast and lunch. Although the school does offer both meals as well, they are... shall we say... not the food I would choose to feed my children on a regular basis. Plus breakfast would be too late for them- they are used to eating much earlier than when they serve breakfast at preschool. So, in an attempt to relieve my anxiety, I came up with a plan to stay organized with the girls' packed lunches!


When I first started thinking about what I needed to have in order to pack 2 lunches as quickly as possible each morning, there were 4 things I knew I needed: 1) lunch boxes with separate compartments, because my girls are in a phase where no foods must touch other foods, 2) a way to plan out what I needed for lunches a week at a time so I could continue to grocery shop once a week, 3) a way to try to make sure I have a balanced meal each day, and 4) a way to figure out where everything would go in the lunch box, so I don't have to complete a jigsaw puzzle each morning. 

The first thing I did was buy my lunch boxes (and some cupcake liners for smaller foods in bigger slots and, let's be honest, to add some fun color):


I love these lunchboxes because they are colorful, they don't leak between compartments no matter how you turn them, they are dishwasher safe, and they are pretty easy for the girls to open and close themselves. Also, they're not too expensive. I got them here (and the cupcake liners here).

After considering several different options, I landed on my latest favorite organization method: magnet boards! I picked up some 88c cookie sheets at Walmart and got to work.


I cut out shapes from the scrapbook paper to look like the 5 compartments in the lunchbox. I traced around a small cup for the circle, and just eye-balled the rest. Then I taped the shapes down with double-sided tape, and ended up with this: 


The next step was to make magnets with different foods that the girls would eat. I wanted to have a list of vegetables, fruit, protein, carb/snack, and dips. I asked the girls to tell me what they liked and we made a huge list together. Then I wrote each one on a piece of regular white paper that I stuck to these self-adhesive magnet sheets. I used a different color pen for each category.


Then I just cut out each word. I have plenty of space leftover to add more foods as we think of them, or to use with other projects. It was after I cut all of the magnets out that I realized that there were a lot of them, and they were going to take up a lot of space on the magnet board! Originally I had wanted to have the whole thing on one cookie sheet, with the extra magnets off to the side and the shapes for the lunchbox compartments on the other. There was no way they would all fit, so I just used another cookie sheet, made column for each food group with more scrapbook paper to match the colors I used for the words, and ended up with this second board:

I used some command strips to hang them up on the wall right in between the cabinet where I keep the lunchbox supplies and my command center where I plan out my week and our dinners.


Woohoo! My plan is to use them to plan out lunches for a week at a time. I'm planning to pick out 3-4 items from each category and re-use some of them a few times during the week (as well as using the veggies and fruits for other meals). The reason I want to have the compartments as a visual is because I can't assign a category to a particular compartment, because some things are too big or too small for each area. So if I have a banana in the big section, I can put some meatballs in one of the smaller ones. My plan is to put all of the items for each area on the board, then move them off to the side as I use them. That way I can avoid repeating foods too much (we all know how 3-year-olds feel about eating the same food 2 days in a row!! unless it's ice cream...).


I'm sure this system will evolve (and potentially be completely replaced) as I find my rhythm, but for now I am happy to know I have a system and a plan to follow, so hopefully I won't be running around on a Thursday morning trying to figure out what to pack for lunch!

Those of you with more experience than I with packing lunches every morning: do you have a system for planning out lunches? What do you use? I'd love to hear your ideas in the comments!